yobit eobot.com

Announcement

Collapse
No announcement yet.

1994 4Runner V6 3.0 aka The Beast..

Collapse
X
 
  • Filter
  • Time
  • Show
Clear All
new posts

  • #46
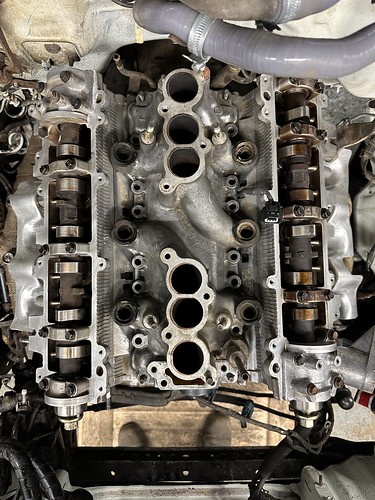
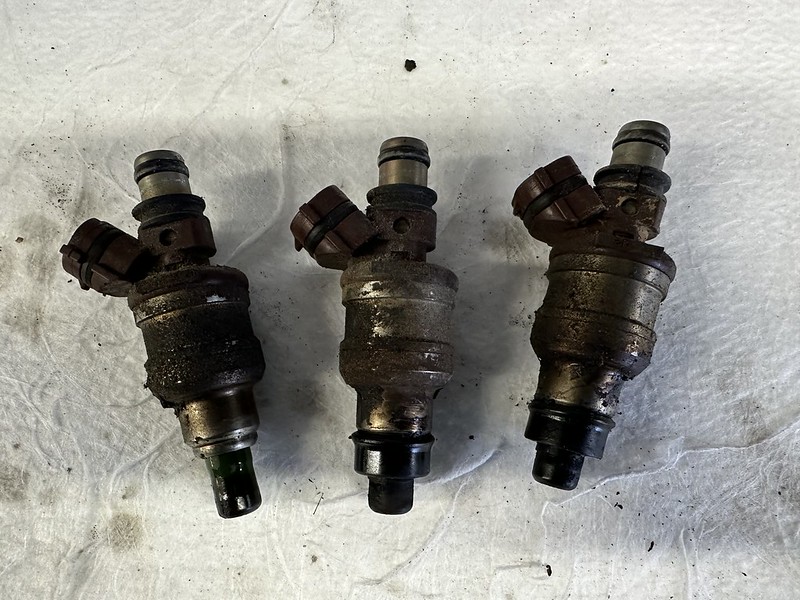
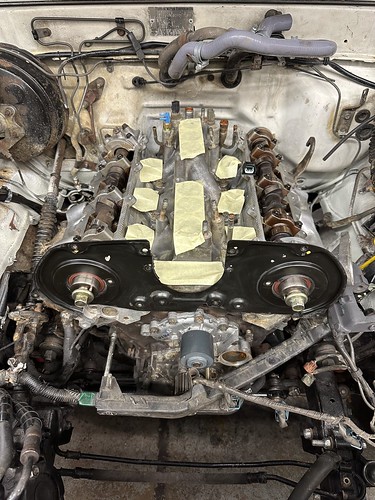
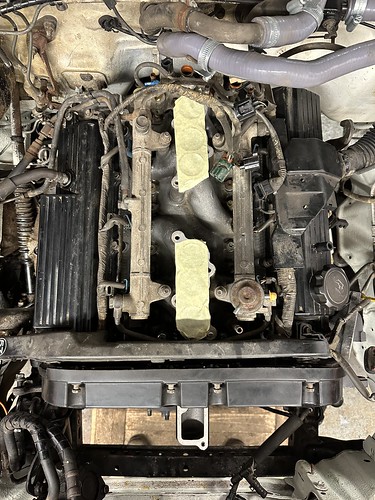
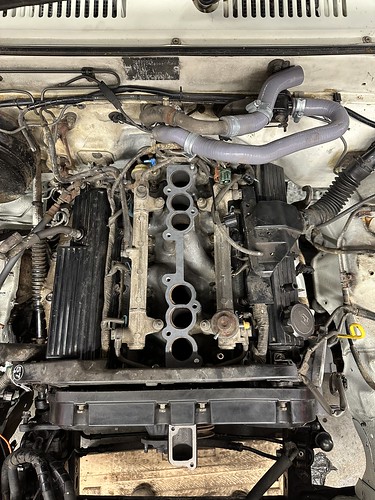
    Tore the Top End of the 3VZ-E a couple of weeks ago, managed it in a single day which pleasing - this was my first time, so I really had no idea how it was going to go..

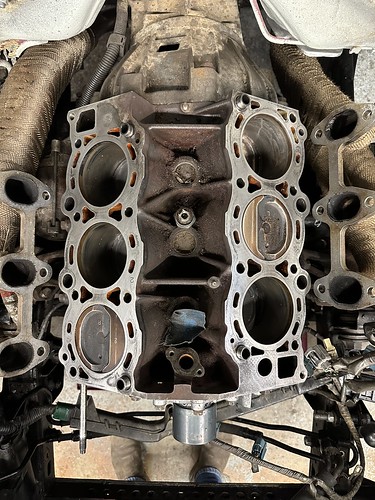
    Had no Bad Luck on the way down, with all the Head Bolts coming out without issue / breakage / snappage etc.


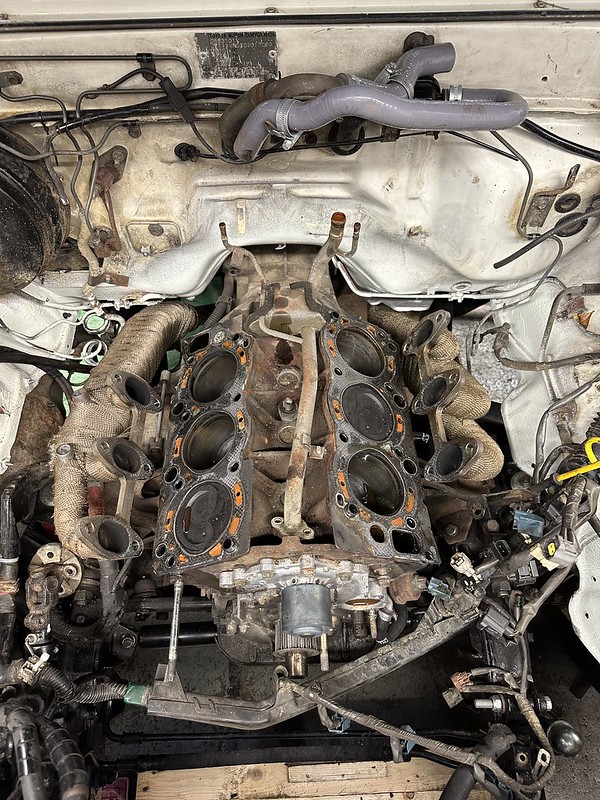
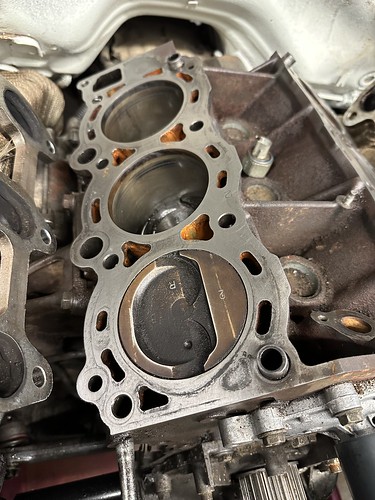
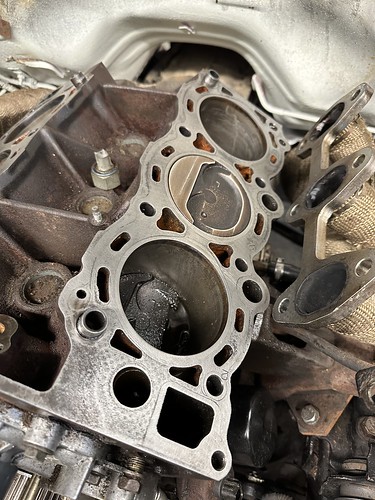
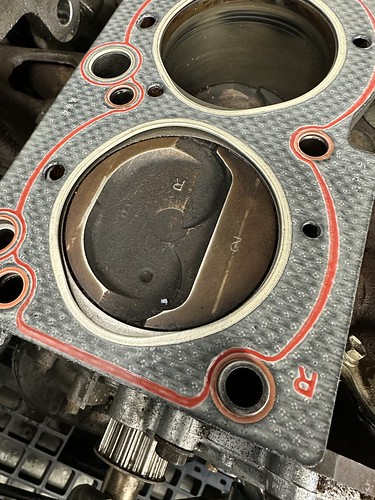
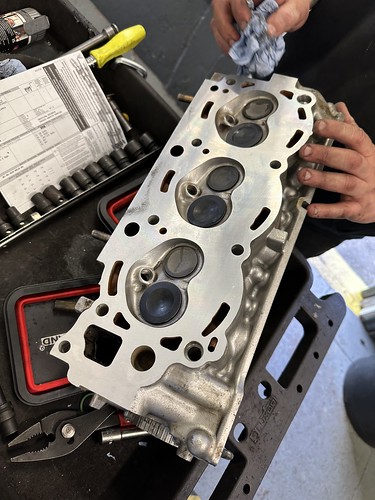
    Head Gaskets still in place in the Photo above, so we could inspect the condition and failure point..


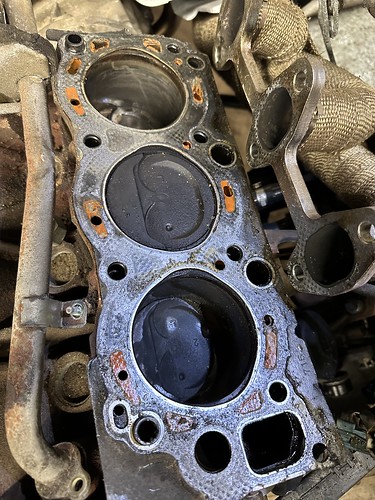
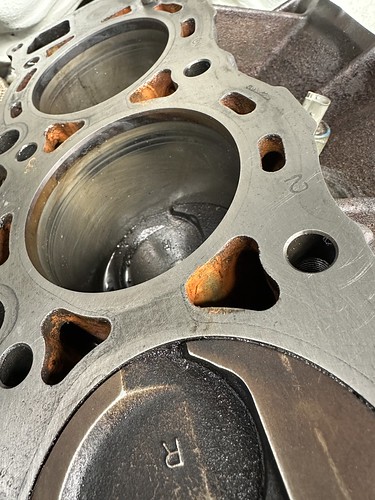
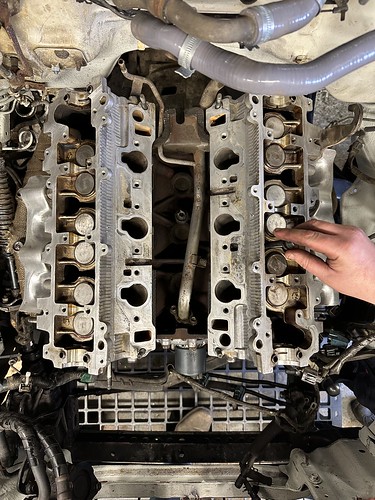
    The Usual Suspect was the blame, with the Gasket failing around Cylinder Six.. Visible Signs of the failure with a nicely washed Cylinder thanks to the Coolant.. Anyways, moving on..

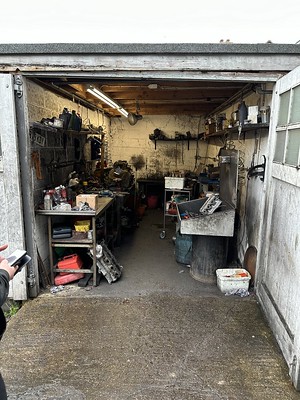
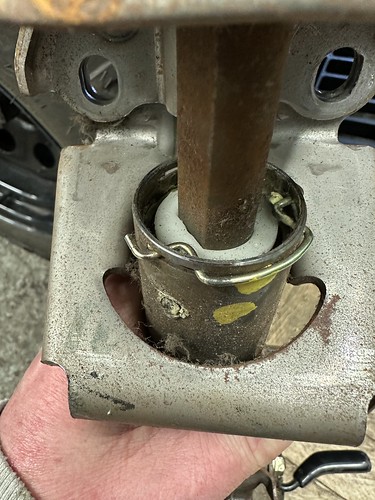
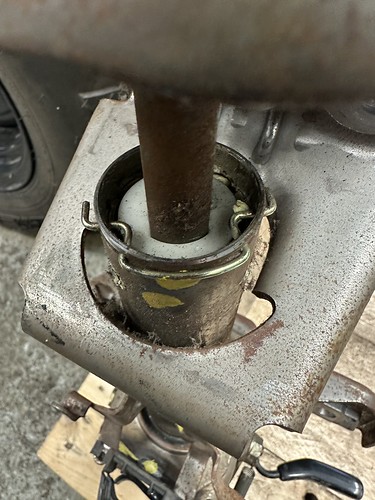
    Heads went off to a local Machinist..
    Last edited by kingroon; 27 February 2024, 10:50.

    Comment


    • #47
      If anyone needs a Machinist in the South East / Brighton area, I can recommend Sprabuild.. Old School Perfection..


      ​Back in the Garage, time to prep the Block to take the Heads.. WD40, Flat Iron Block and some Emery Cloth to smooth out any imperfections.. Nice and slow, steady and uniform down the length of the Cylinders..


      Air blown Threads clear and clean, time for the Head Gaskets to be offered up..​


      Job made easier with L & R markings to correspond with the Pistons..

      Lovely skimmed Heads, with new Valves, Springs, Guides and Seals.. On they go, then the Camshafts removed to gain access to the Bolts..


      RTFFSM..


      Speaking of which, I host the Full Service Manual on my Dropbox, made Public..
      Last edited by kingroon; 27 February 2024, 10:14.

      Comment


      • #48
        New Knock Sensor Cable, new Lower Intake Gaskets..


        Tackled the Fuel Injectors at this point, with a new Seal Kit from Mr Injector UK. For the 3VZE you need Kit 109, and one of two Seal Kits depending on your Engine Spec; 14mm or 16mm. They sent me both as I was unsure, turned out to be the latter.


        They came up pretty good..


        Last edited by kingroon; 27 February 2024, 10:54.

        Comment


        • #49
          Cam Pulley back Plate, Cam Pulleys on..


          Cam Pulleys Cover, Fuel Rail and Rocker Covers on.. Upper Plenum Gasket offered up..


          ..and finally the Plenum itself.. And then Vacuum Hoses, Throttle Cable and Electric Connectors reunited..

          Comment


          • #50
            While it looks as though it was Plain Sailing from the Photos above, I can tell you that it was not.. The Rebuild took 3 Days that were beset with distractions, interruptions, crossed Threads, late delivery of parts, Coffee Runs and a rather serious issue discovered with the Steering Column; we had to remove it to gain access to and allow movement of the OS Exhaust Header, and glad am I too that we did..

            It became apparent that at some point during the disassembly or reassembly of the Body and Chassis while the 4Runner was in Somerset, the Steering Column was not attached/detached properly and was pulled, dislocating the Retainer Clip that holds the Engine Bay Column Section into the rear of the Cabin Section of the Steering Column, meaning that the section was held in by its position only; it was not secure.


            When I applied a small amount of force, pulling the Column, it fell out of the Connection causing the two to be disconnected and hence No Steering. It was quite a terrifying prospect to think that this could have happened on the Open Road, or Motorway, or even whilst driving through a Town or Village jolted by a Pothole, Speed Bump, whatever. Indeed, when I used the Tilt mechanism, it fell out of its own accord. Like I said, terrifying stuff..

            I haven't contacted the Garage on Somerset about this yet, but I intend to.

            You can see here how the Circlip should be, in a Steering Column I managed to source during the Week between Teardown and Rebuild..


            So, fitting the replacement Steering Column ate up a bit of time..


            Once removed, we needed to transplant the Ignition Arm and Barrel from the old to the new unit; welding on a Nut to the Sheer Bolt and then teasing out with a Wrench..


            Comment


            • #51
              Back to the Rebuild, it came time to address the Fluids.. First on the List was to check the Old Oil..


              We knew it would be an Emulsified Soup of Oil and Coolant, but we needed to check for any Metal.. Good News again, with no Flecky Sparkly bits..

              New Filter threaded on and Coolant Hoses reattached, the 3VZ-E was topped up with Toyota 10W-40 and Long Life Red Coolant, both sourced from Rough Trax..

              Comment


              • #52
                The Top End Rebuild Saga continues..

                I left the 4Runner in Brighton with Andy as he did not want to let me have it back without a decent Road Test; he wanted it to be 100%.. Good job too..


                While driving the 4Runner, the Engine Temperature Gauge would sit happily at the midway, the Coolant being cooled sufficiently. However, when sat idling, the Engine Temp would rise slowly but surely, until rev'd beyond 1000RPM, thereafter the temperature lowering to an acceptable reading. It was a little puzzling..

                After a phonecall and some discussion, it was decided that the introduction of the upgraded Aluminium 4 Core Radiator was to blame..


                The 3VZE Engine holds approximately 9.5L [out of the Factory] of fluid in its Cooling System, but the introduction of the new Radiator upped this capacity to nearer 13L which put additional, and as it turns out untenable, pressure on the Water Pump to do its job; it simply couldn't push that amount of Coolant around the System at idle / 750RPM.

                Short of the introduction of an additional Water Pump such as a Davies Craig unit, a return to OEM Stock Radiator was the only option..

                Comment


                • #53
                  I opted for a Mishimoto unit, which is a quality brand and an endorsed replacement for the 3VZE Radiator. Only trouble is, they tend to be manufactured on demand from Denmark, rather than held in stock, and since no UK Supplier had one, I tracked one down in stock at FR Sport in the US; moreover, it was in a Sale and they shipped Worldwide.

                  In it went..


                  Topping off the Job, literally, is a 0.9 Bar Rad Cap [not supplied with the Radiator rather frustratingly] and with the requisite Litres of Red Coolant poured in and the System bled, the Job was [finally] done.


                  Lessons learned..? You betcha. And expensive ones too; but there’s an idiom about that, I’m sure.

                  Burbling back home through the Sussex & Kent Countryside, looking over the Steering Wheel, I found myself experiencing a sense of Pride. Pride that I had Top End rebuilt the V6 under that Bonnet, something I had never done before, something at great emotional expense [as well as financial, obviously].

                  Comment


                  • #54
                    Day Trip to Powerflow Exhausts this week, to sort / correct the howling rasping vibrating Hell that was the 4Runner's Exhaust..

                    I had paid to have a custom one crafted by Hellbent in Somerset last year, but he must have had an Off Day, because it was a mess..

                    At the Tip, it measured 95db at Idle on an iPhone App, and just over 70db in the Cabin, which was simply too loud to do any more than an Hour or so of Driving; it was quite disappointing, and actually bloody annoying given the Day Rate that I had paid Hellbent for it..

                    Up on the Ramps at Powerflow:


                    ..and where the Exhaust rightfully belonged..


                    Comment


                    • #55
                      Powerflow's Creation..


                      I cool 85db at the Tips, and just below 60 in the Cabin, and yet still a burbly V6 Note when on the push..

                      Those with a Keen Eye will notice that I had removed the Spare Wheel Carrier from the Chassis. The larger 265/70/17 Tyre would not fit in the arms, so I will sort either a Boot Space or Roof Mounted solution for that soon. In the meantime, it will go in the Back in a Cover..
                      ​​​​

                      Comment


                      • #56
                        A slight change to the programme schedule now, with a move to the Interior for your viewing pleasure..

                        The Original Carpet was as close to Threadbare as it could get without actually being Threadbare.. Stained, Bleached in one spot, and filthy all over, and it's Grey which is pretty dated.. Pulling up the Carpet revealed Decades of Dust and Dirt, I decided to start at the Back and work my way forward..

                        I have had my eye on the replacement Carpet on offer at Ray Buck in the US, waiting for the right moment.. Shipping was the deal breaker every time I went to price it and click Buy Now.. I had also gone around in circles over the Colour Combo for the Interior.. Greens, Blues and Browns, but ultimately knew that Black would be the most logical for colour matching when it came to restoring the Trim Parts and ultimately replacing the Seats..

                        At the beginning of April Ray Buck decided to have a 20% Off Everything Sale, so I seized that moment and hit the Button; a coupla weeks later, the Carpet Set arrived..


                        Naturally I went for the more expensive option of the Mass Backing, which more or less doubled the cost of the Carpet but provided an extra layer of Comfort, Quality and Sound Deadening..

                        Comment


                        • #57
                          This is going to be a bit Photo Heavy, but worth seeing for the transformation..


                          I came across a bit of Surface Rust around the Wheel Arches, so treated that with some Kurust..


                          Next was the Sound Deadening.. Having spoken to Matt at Silent Coat, he recommended 3mm for the Cabin area and 4mm for the Boot section..


                          Cardboard Templates for the Wheel Arch sections..


                          ..and smaller pieces to match the curved arches themselves..


                          Looked pretty good when all done..


                          ..but it was missing that Finishing Touch..


                          So I Aluminium Taped all the Joins.. This was the most difficult part of the Job.. That Tape is Super Sticky, Super Inflexible and Very Very Sharp..

                          Comment


                          • #58
                            Next was the Carpet..


                            ..and these Sections of Carpet were cut perfectly to fit so no Trimming required..


                            ..although I did need to cut openings for the Cargo Net Hoops..


                            I have also painted all the Plastic Interior Trim to match the Black Carpet, so it was very satisfying to install that too..


                            Comment


                            • #59
                              The Rear Tailgate Panel had seen better days, and when Hellbent neglected to install the Metal Cover over the Glass and Mechanisms etc. and then sit on that Panel to refit parts, they had cracked the Hardboard and rendered it weak, bowed and ultimately damaged beyond repair..

                              So I popped down to Homebase and picked up a like for like piece for £10..


                              Perhaps a little bit unnecessary, I decided to use a bit of Padding on the Panel, to make it a little more comfortable for those Post Surf Coffees / Beers and also to help with Sound Deadening.. I had noticed, driving around without the Panel in place, that the Road Noise came into the Rear Section noticeably..


                              Next was the Carpet, and rather than use the piece that came with the Ray Buck set, I went with a piece I bought from Ebay for a few £££.. Perlon texture and Fire Proof..


                              Was pretty pleased with the finished article; time to install, with the Metal Protector back in its place of course....


                              Sorry about the dirt and dust in the below Photo, I had taken an Old Fridge to the Local Tip..! Yes, this 4Runner is still a Work Horse..


                              Comment


                              • #60
                                The Rear Seat Backs needed similar attention, and again I used the Perlon Carpet rather than the Ray Buck pieces since I could fold and Staple Gun them in place..

                                I also opted to reuse the original Hardboard since they are not required to support anything, more just cosmetic pieces..


                                I did however flip and switch the sections, as Toyota has inexplicably decided to glue the Carpet to the rough side of the Hardboard which ultimately had failed and become detached.. I also took note of the Seat Clasp Flap..


                                Nice..

                                Comment

                                Working...
                                X