yobit eobot.com

Announcement

Collapse
No announcement yet.

safari Snorkel 3rd Gen

Collapse
X
 
  • Filter
  • Time
  • Show
Clear All
new posts

  • #16
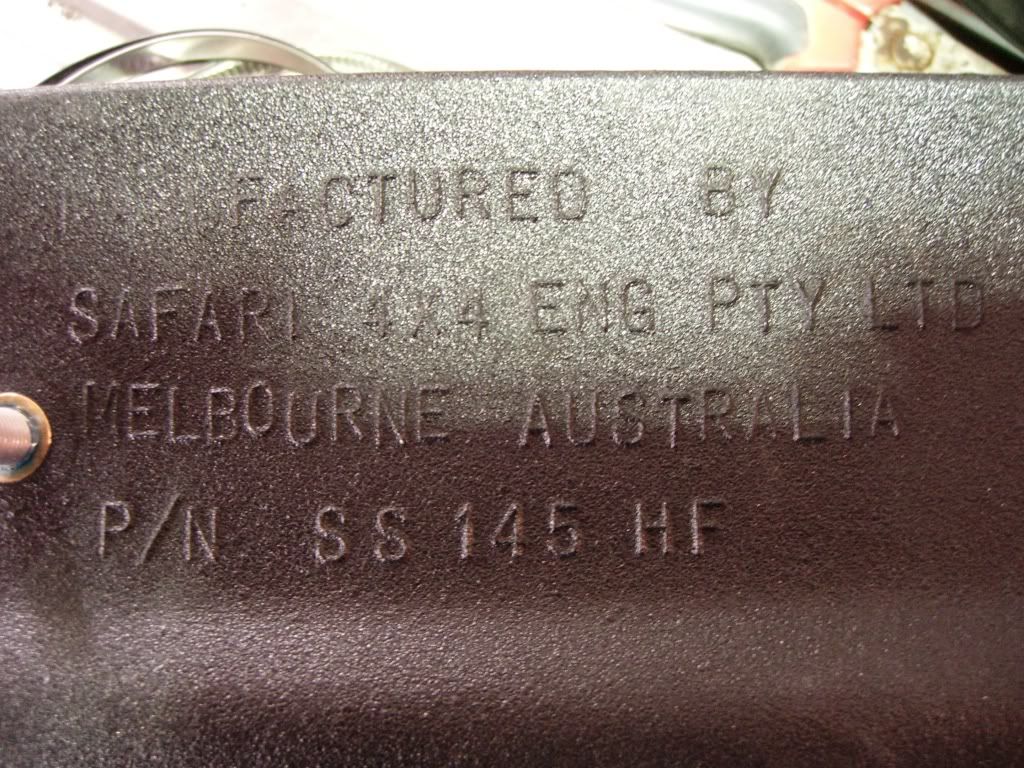
    On another thread the snorkel model number is stated to be ss146hfe not ss145hf as per the picture above.
    I need it to fit a 1998 3rd generation kze185 3l turbo diesel air intake on near side. Please can someone clarify which one I need please?
    Thanks.

    Comment


    • #17
      The Safari site says that the 143HF is correct for our 1kz-te engine. The other one pictured above is designed for a 5L engine.

      Comment


      • #18
        Originally posted by wishbone View Post
        The Safari site says that the 143HF is correct for our 1kz-te engine. The other one pictured above is designed for a 5L engine.
        Originally posted by ajstars View Post
        On another thread the snorkel model number is stated to be ss146hfe not ss145hf as per the picture above.
        I need it to fit a 1998 3rd generation kze185 3l turbo diesel air intake on near side. Please can someone clarify which one I need please?
        Thanks.
        Either fits, there are a couple of extra bits in the 5L one, but price is the same, so just get whatever one you can.
        4x4toys.co.uk - Keeping you on and off the road...

        Comment


        • #19
          Snorkel

          Are the extra bits useful? Is there anything not supplied that I will need to get?
          Thanks

          Comment


          • #20
            Originally posted by stephenmarr View Post
            Pretty handy to fit takes a couple of hrs once your fairly handy with tools
            You will need a Step Drill

            for wing and pillar holes

            DO NOT USE

            ordinary steel bits on the body of the jeep.

            Before pic


            ready to get going
            Part number for my Hilux Surf


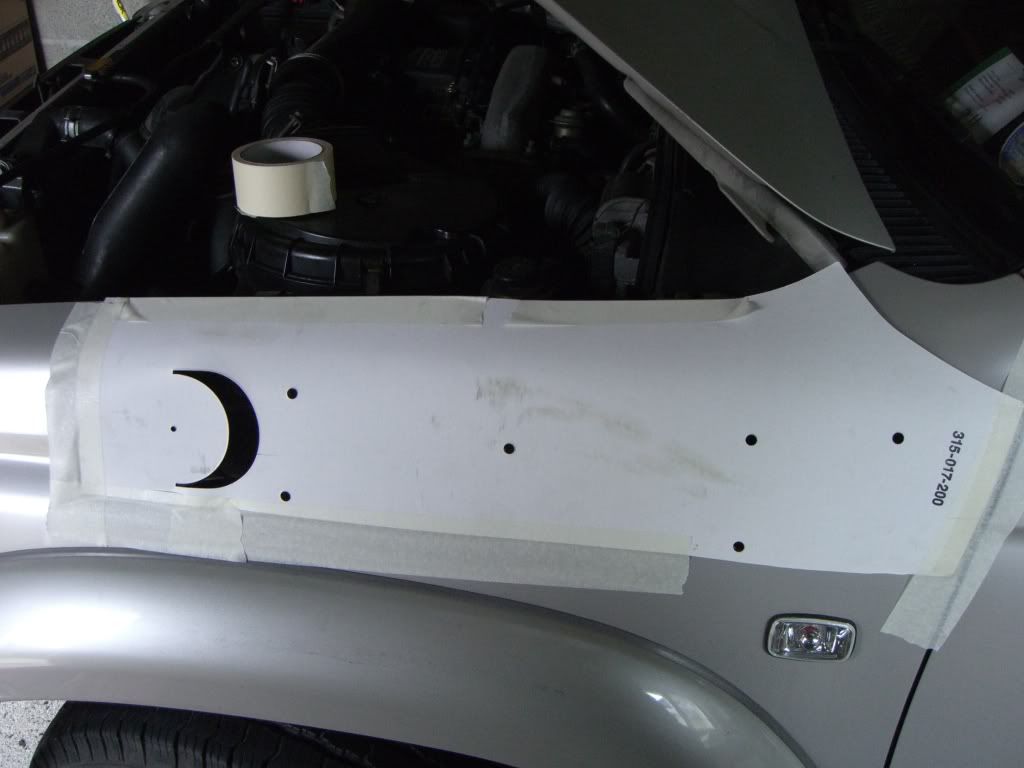
            Template


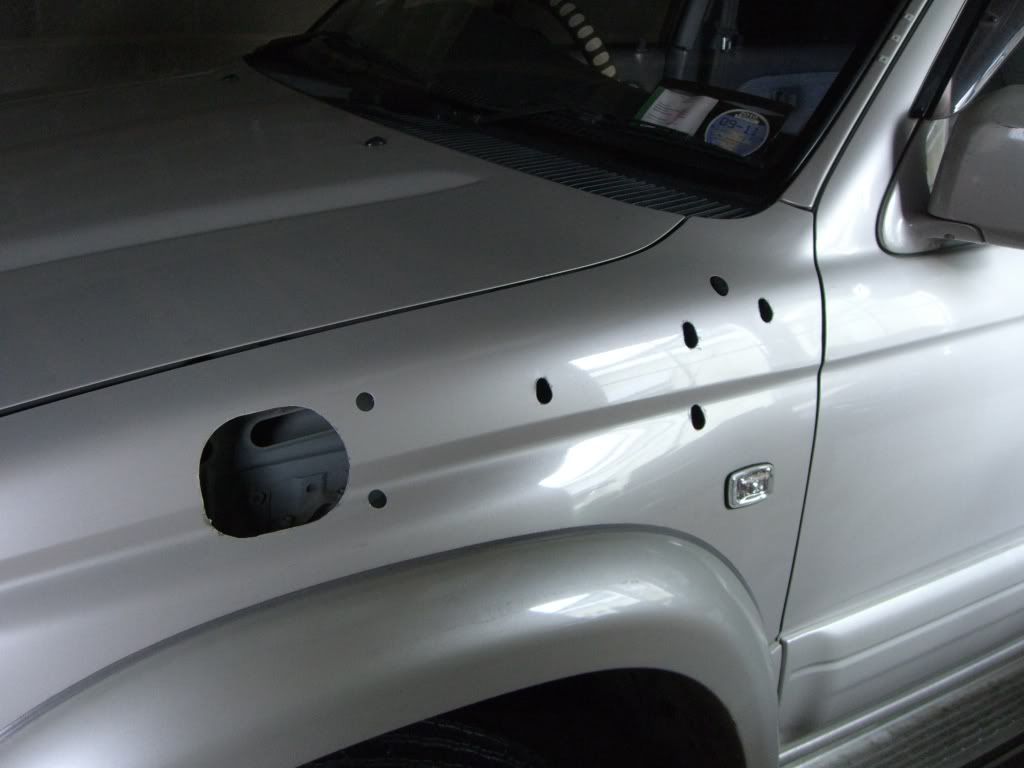
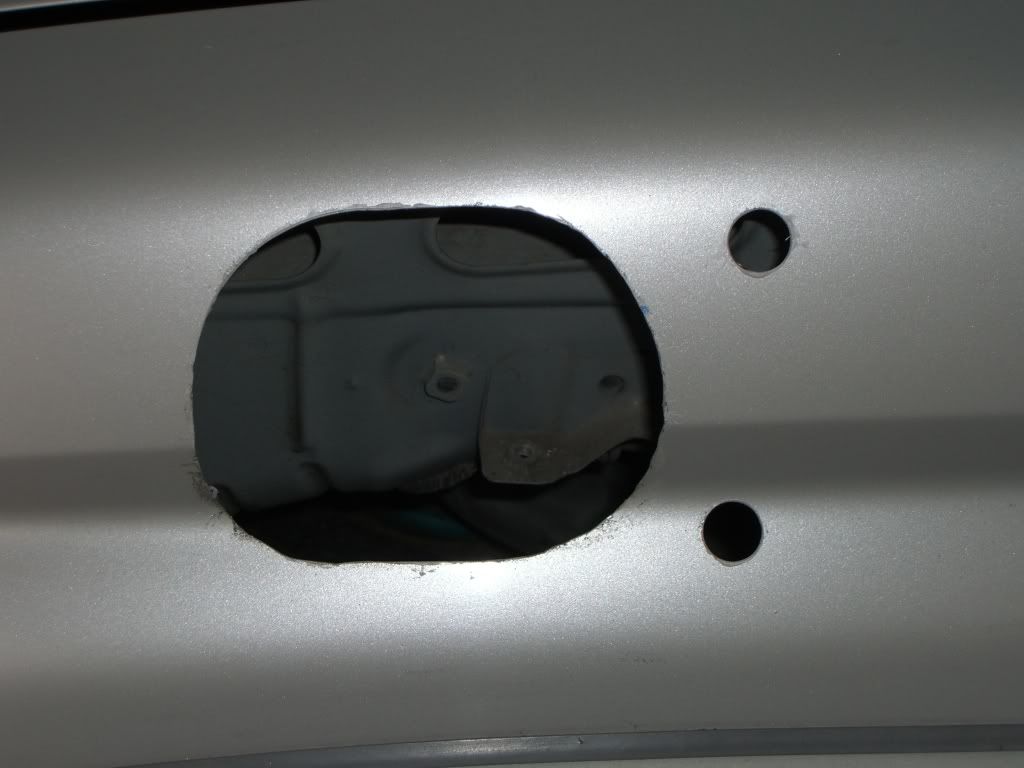
            major scary part is cutting the big hole. all i can say is measure 10 times then cut


            had to slightly modify the holes


            A pillar holes easy to line up once snorkel is fitted


            make sure and use lock Tite


            Nice fit


            A Pillar mount


            All Done


            After


            Then sit back and relax
            wasnt scared about cutting hole using correct drill bits etc found it really easy ,,,,,,,,,,,,,,,,,,,,,,,,,,,,,, ,,,,,,,,,,,i asked tony to do it and he done great job
            Only Toyota can get you out of shite

            Comment


            • #21
              Snorkel fitting kzn185 3rd Gen

              Just about to fit mine. One question - and I know this is an old post, but do you have to remove the wing or can the intake nuts be fitted with it in situ? Also I see the aerial was removed at one point. Is this necessary? Thanks

              Comment


              • #22
                3rd Gen snorkel fitting instructions. Step by step.

                I have just fitted my snorkel - purchased from the well known auction site for £99. It has Hilux on the side and appears to be very thick and well made. These are step by step fitting instructions as I couldn't find any good ones anywhere.

                In the pack you may have an approx 3 inch washer, 1.5 inch thick spacer an M6 washer. These are not used on the surf!

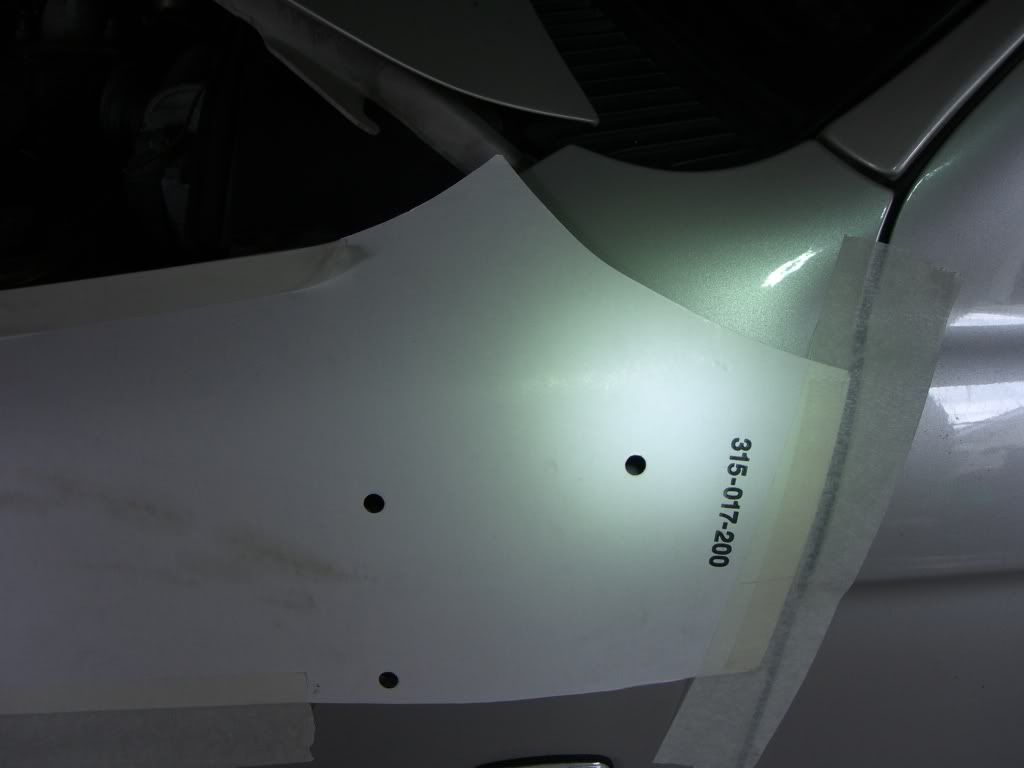
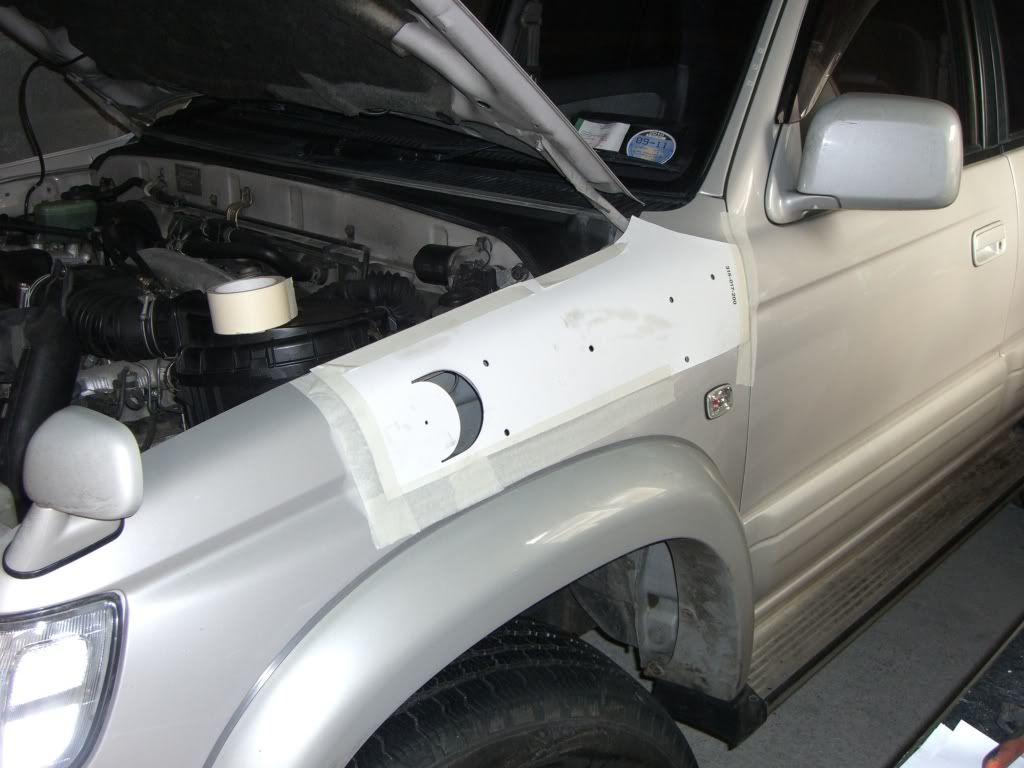
                The card template it came with did not line up with the holes when laid across the snorkel. So check this and make new holes if necessary. I also found lining the template up with the top of the wing and the door line did not work - the snorkel would have fouled on the door opening, although due to the odd shape of the snorkel it was very difficult to be 100% sure on this.

                I made numerous measurements and markings on the wing which I polished prior to working on and then covered in masking tape. Also mask the door pillar to prevent scratching it.

                I would like to say I got the alignment right, but I didn't, although it's not too bad, it does sit a bit high. Make sure the aerial dimple is lined up though otherwise you will ruin your wing!

                I made my own template to check the hole spacing and to allow the outline of the snorkel to be drawn on the masking tape.

                Remove the air intake pipe from under the bonnet by undoing the three bolts on the air intake and removing the splash plate next to the coolant bottle (one bolt). Undo the two bolts holding the air intake tube to the wing and remove.
                You will now see there is an additional tube inside the wing!
                To get to this you will need to remove the four bolts holding the wheel arch to the underside and by squeezing the corners of the square plastic trim retainer clips from behind, you can ease these all out (6 of these I think).
                The trim from under the wheel arch should now pull free with a bit of persuasion and bending.

                You should now have access from underneath to two bolts holding the air tube inside the wing. Remove the tube and the bolts. These will not be reused.

                When 100% happy with the placement you need to drill the big hole first. You will notice the hole is not round so you will need to use a jigsaw. I drilled a hole on the outline and using a simple woodworking jigsaw with metal cutting blade on it, I carefully worked my way round, holding the plate of the jigsaw away from the bodywork to prevent damage. Please be careful here. The hole should be cut further towards the back of the car to make it oval. DO NOT CUT THE HOLE ANY FURTHER FORWARDS or you will end up with a visible gap! The only reason the hole needs to be oval is to enable the pipe to slot in.

                Now you should be able to double check your positioning and hole markings. Ensure the door will open and the aerial will operate. I fitted the door pillar bracket to the snorkel just to make sure.

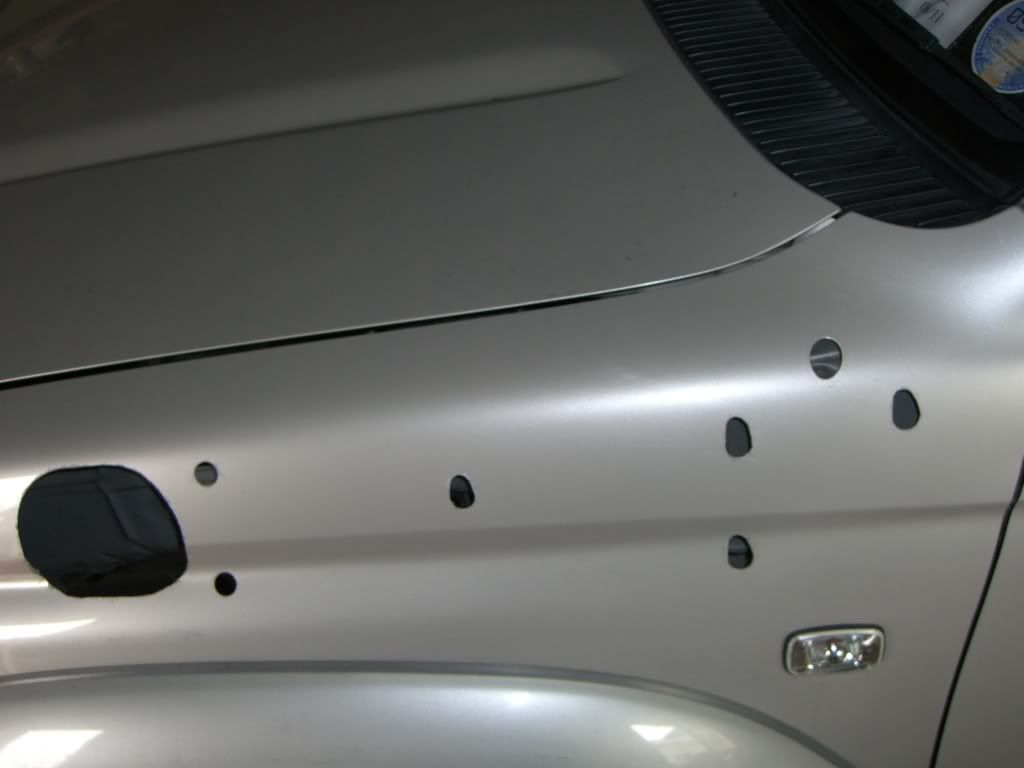
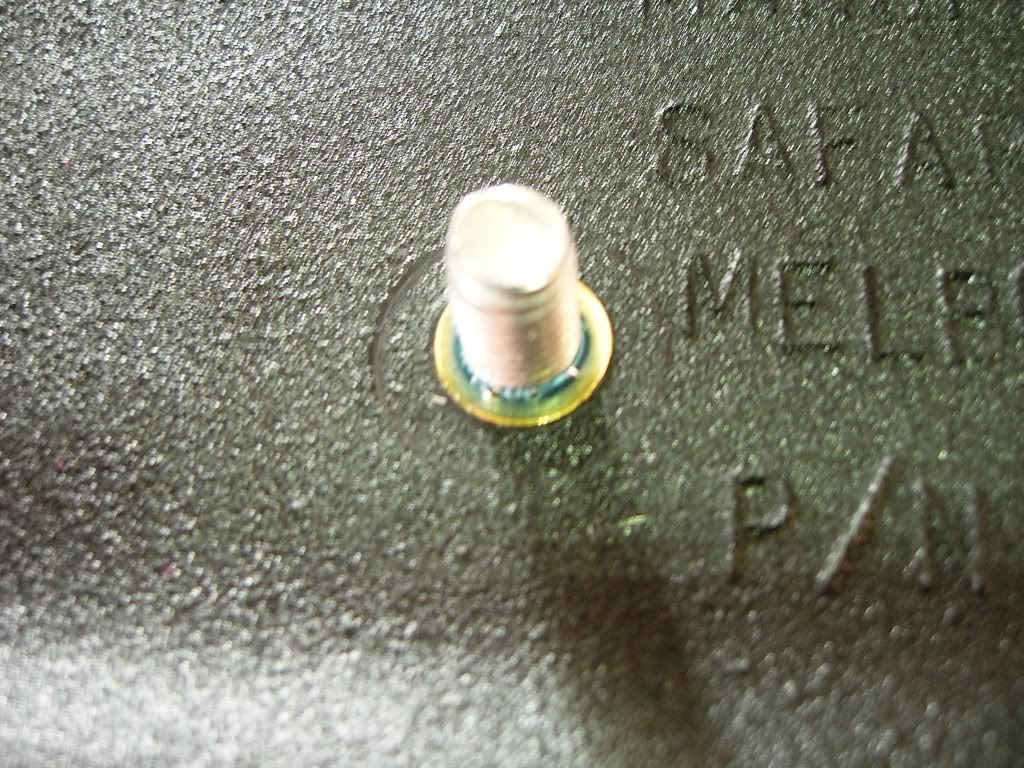
                When happy, drill the remaining holes using the conical drill bit (they really are excellent). Clean off any cutting paste or cooling oil used to drill the holes as soon you will be painting it. Offer the snorkel up again to check alignment. Now fit the studs to the snorkel using some thread lock and offer the snorkel up to the wing again. You may need to enlarge a couple of the holes due to the angle of the studs. A round file does this quickly. Check again and then clean off any burrs. Give the bare edges a coat of zinc primer and allow to dry.

                Meanwhile take the air tube that you removed from the under the bonnet and drill out the three rivets holding the bend on to the tube. Offer up the metal tube that came in the kit and squeeze it over the air tube body. Put some masking tape around the tube and mark the three holes. Remove the tube again and drill holes suitable for the rivets that came with your snorkel. I then used some Soudaflex 40C sealant (it's a very strong rubbery sealant used for marine purposes) and ran a small bead inside the metal tube as I fitted it to the air pipe just to seal any gaps. Rivet the air pipe and the tube together and smooth any sealant off.

                You will now need to undo the three bolts along the top edge of the wing and the bolt hidden behind the door (open door to access this). Pull the indicator firmly forward having removed the one screw above it, just to give yourself some room to manoeuvre and lift the wing up and out. With the door open it should move a couple of inches which will soon become essential.

                Before continuing read my warning - 2 posts down as your tube may need modifying.
                (The next stage: fitting of the rubber tube, can be performed from underneath as well as the method described below)
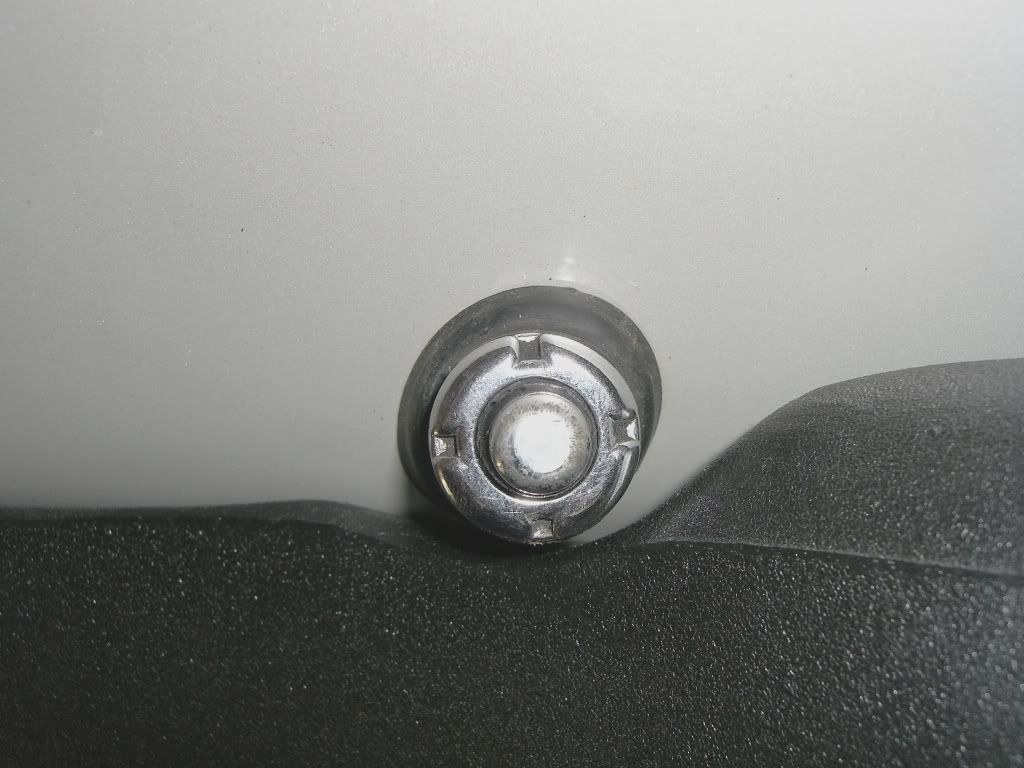
                Using one of the jubilee clips fasten the rubber pipe around the snorkel with the body of the clip towards the engine side. Carefully ease the pipe through the hole and fit the snorkel using the washers and lock nuts supplied. It is a bit tight so you will need to fiddle around a bit. The nut behind the aerial can be accessed from the top.

                Now use a lever (screwdriver will do) to ease the rubber pipe through the hole from inside the wing to allow the previously modified air tube to push into the rubber pipe. Secure with a jubilee clip and refit the air pipe and air filter assembly. Note, where the air filter box meets the air tube there should be a foam seal. My one was intact but there was considerable air leakage so I used a bike inner tube cable tied around this join to seal it.

                Make sure everything is tight and that all nyloc nuts have at least a tiny bit of stud showing (to utilise the locking capability) and now refit the wing, mud shield, indicator and plastic guard next to the coolant bottle.

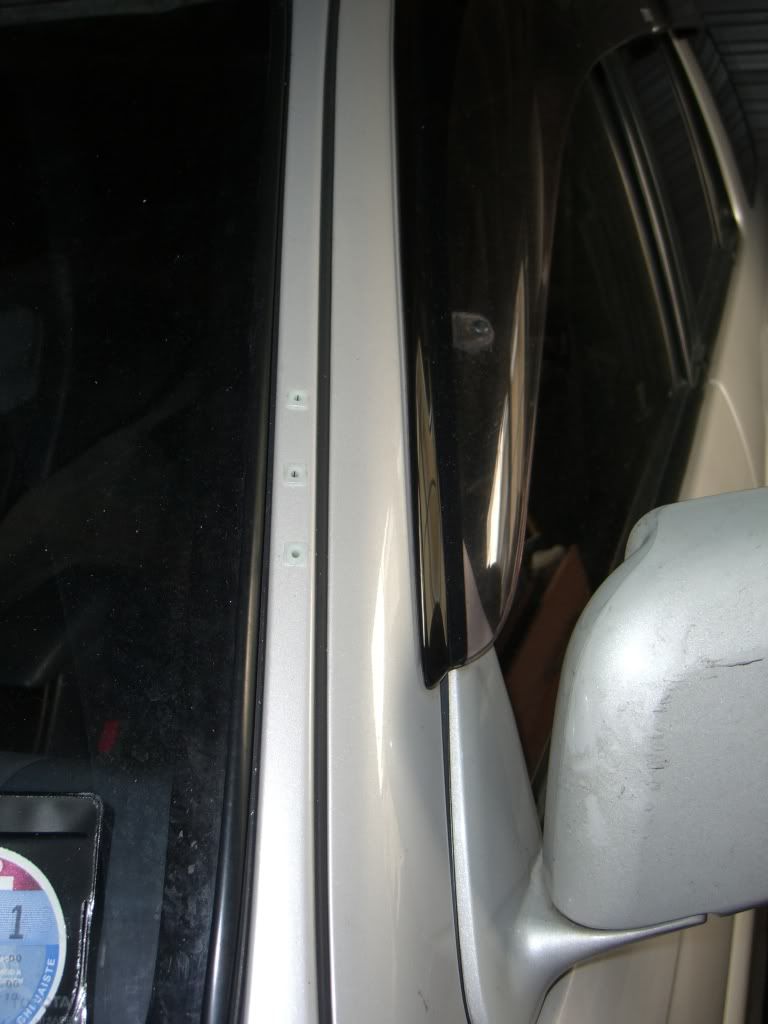
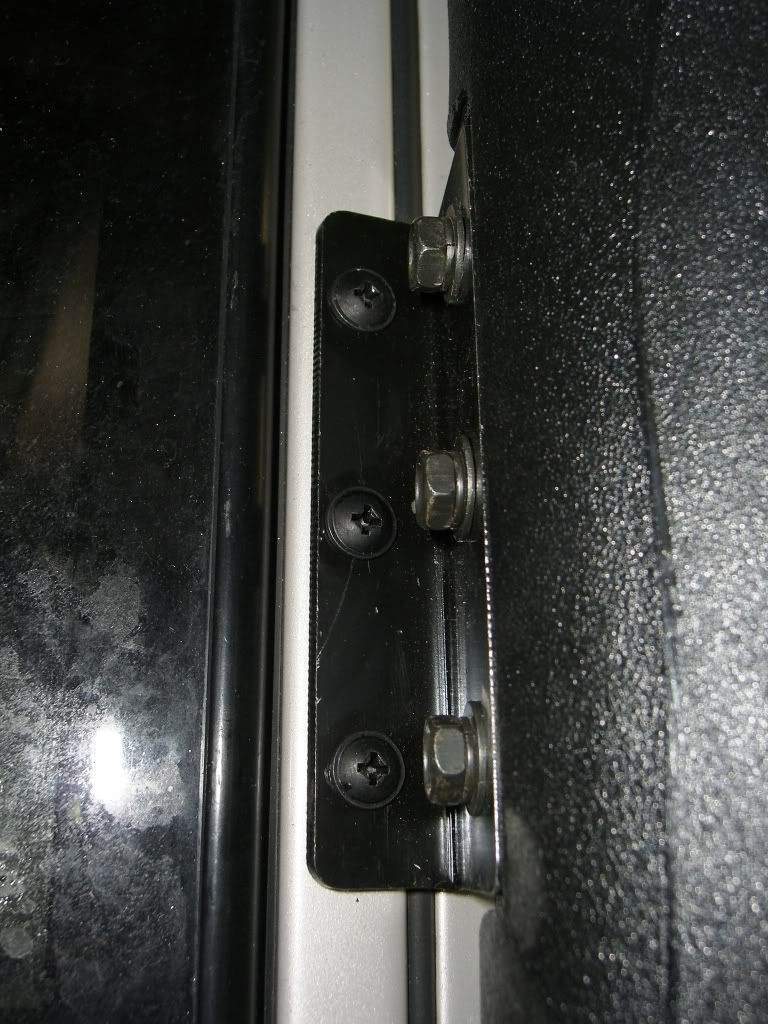
                Now mark the three holes on the door pillar and drill a pilot hole. My kit did not come with the square plastic inserts as the Safari snorkels do, so either use self tappers or buy the square plugs as I did and file the hole square and then screw into that. Again paint the bare metal with zinc primer first. Tighten up the bracket to the snorkel.

                Now onto the head of the snorkel. Self draining?? Really, well I did not trust it as the drain slot was pretty much closed up after fitting so I just drilled into the slot to enlarge the water outlet a bit. It's up to you, but I didn't want to take any risks! Fit the head using the last jubilee clip and away you go.

                Good luck.
                Last edited by ajstars; 1 December 2013, 20:32.

                Comment


                • #23
                  Photos to aid the instructions above

                  Added some more photos...
                  Overnight the black screws supplied for the pillar mount and intake head went rusty, so I have changed these for stainless varieties.
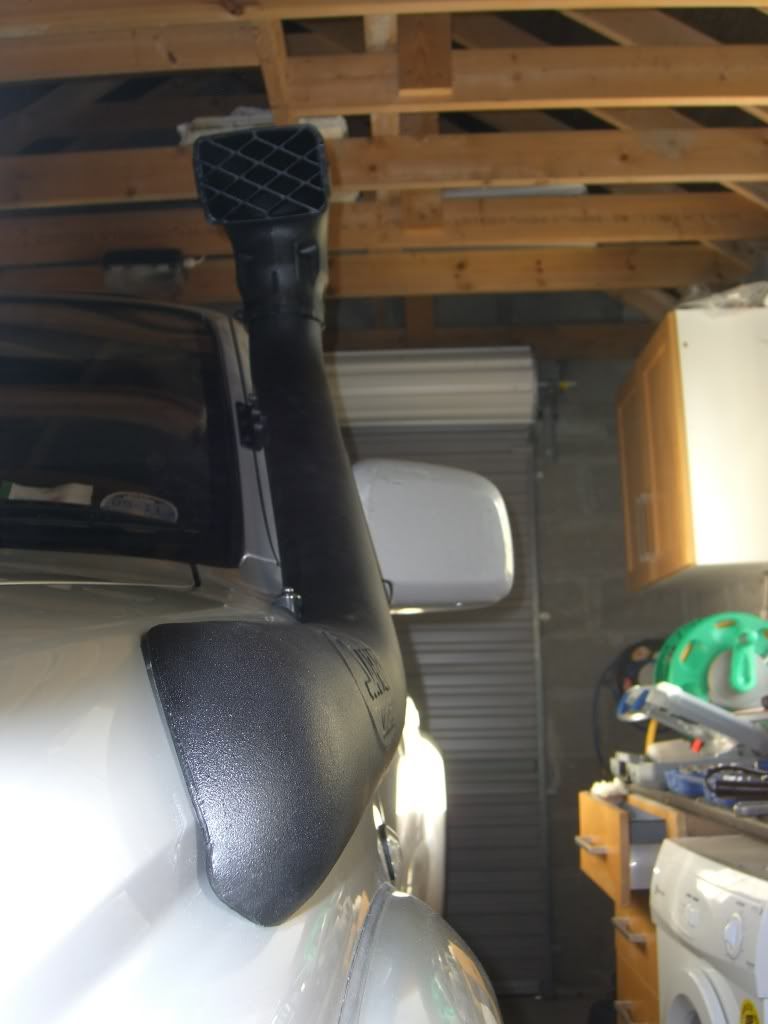
                  Looking down the length of the snorkel it appears maybe it should have gone a bit lower (and maybe a bit further forward, as, if going lower this would enable enough clearance for the door to open) as the contour of the snorkel is not in line with the body and the rearmost stud would not tighten all the way in, so if you look down behind the snorkel you can just see the stud. I guessed the studs supplied were mild steel so I changed the stud for a stainless one too. You would not normally see this, but I know its there!

                  Do bear in mind when marking up your holes - DO NOT TRUST THE TEMPLATE and measure the left and right axis just as much as the up and down axis! It is quite tricky to do and keep clearance between the snorkel body and the door opening. However, the snorkel is on and the lines actually flow very nicely off the top contour of the wing, so I am happy. What I did do afterwards though was to use some more Soudaflex 40C and having carefully masked off the area, I ran a thin bead around the front of the snorkel to hide the ever so slightly visible hole in the wing. Great stuff, Soudaflex as it skins over quickly and is extremely rubbery. It matches the snorkel body perfectly and will not peel out like silicones will.
                  Looking at the snorkel head - make sure those drain holes operate! I drilled mine a bit further up into the water catchment area to make sure!

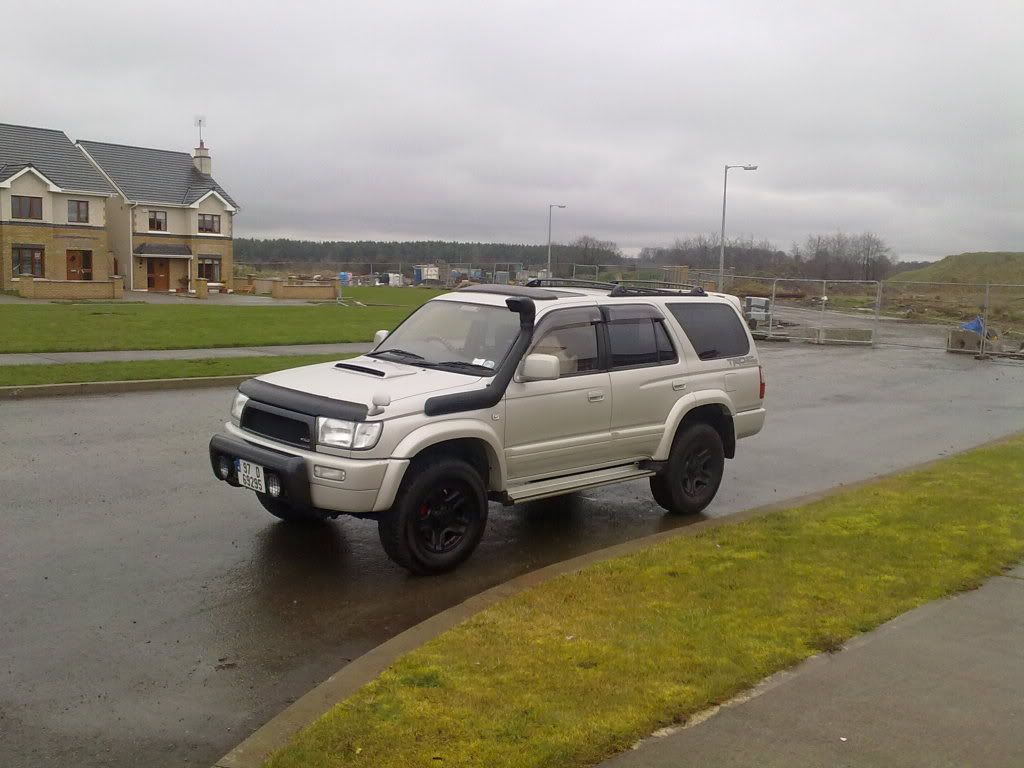
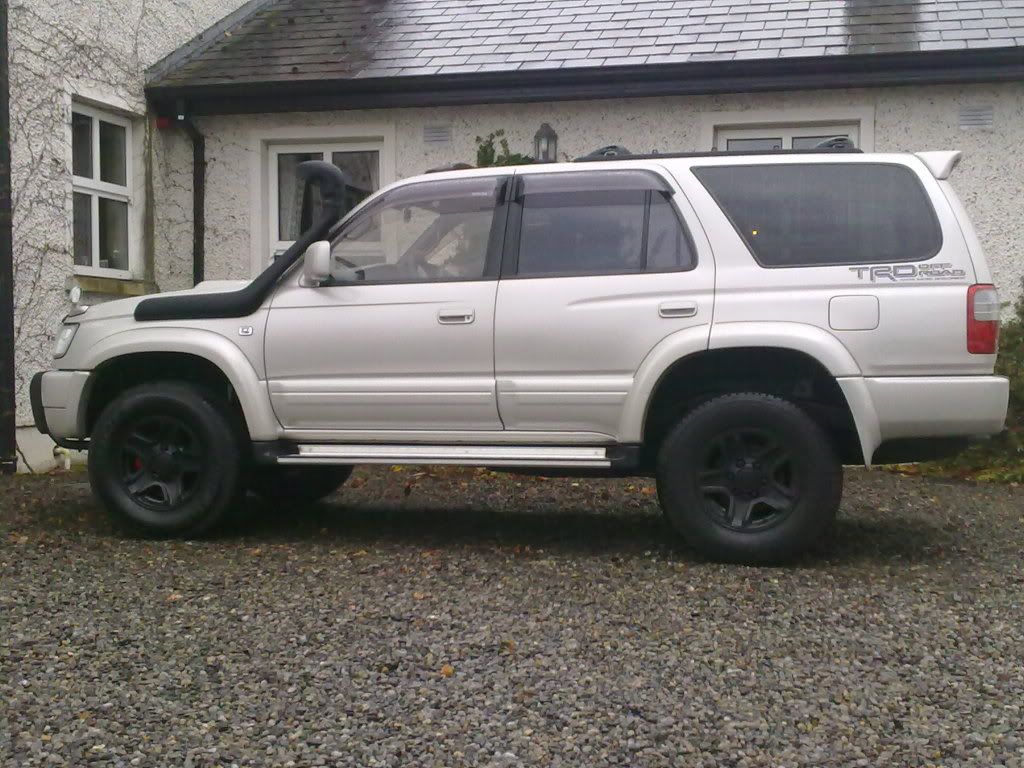
                  Snorkel by the way was listed as a Hilux 167 Snorkel.

                  Good luck.
                  Attached Files
                  Last edited by ajstars; 28 October 2013, 11:08. Reason: Adding Photos

                  Comment


                  • #24
                    Snorkel Warning

                    Warning:
                    At 2800rpm I was getting a loud (really loud) noise from the snorkel. I investigated and discovered that the rubber tube supplied to join the snorkel to the intake pipe inside the wing, although about 1/4inch thick, was sucking in on itself and restricting the air flow.
                    This could have serious consequences to your engine, but fear not, I found a remedy!
                    With the rubber tube off the vehicle, measure carefully and insert a section of rainwater down pipe into the tube (round the ends to remove any sharp bits). It's an almost perfect fit, but in order to help the oval ends of the tube fit the snorkel, I heated the inside of the down pipe with a hot air gun and squeezed it into shape. Now the tube is not only smooth, but the bore has been opened out a bit helping the air flow and it can no longer suck in on itself.
                    I refitted it all and sure enough the noise has disappeared.
                    I don't know if this will happen with Safari snorkels or if it's just a trait of cheaper varieties?

                    Comment


                    • #25
                      Just got myself one of these off of fleabay. One question...

                      Where did you purchase the plastic square inserts?

                      Thanks
                      Last edited by Cyberlux; 6 January 2014, 23:11.

                      Comment


                      • #26
                        Square inserts

                        Originally posted by Cyberlux View Post
                        Just got myself one of these off of fleabay. One question...

                        Where did you purchase the square inserts?

                        Thanks
                        My local independent auto factors (Rose Auto Supplies) had them. I think they're a standard part.
                        If you fail to find them PM me and I can get some and post them to you.
                        Good luck, and don't cut the drainpipe too long - you still need ample rubber at the end of the pipe to fit over the snorkel body!

                        Comment


                        • #27
                          Hi Folks

                          If anyone still has the installation instructions for the SS145HF can you scan or somehow pass them on to me? I got the 146HFE for my jap surf and I think I needed the 145 instead, but will be able to make up the parts I need once I understand exactly where they go!

                          Cheers

                          Matt

                          Comment


                          • #28
                            Snorkel

                            Hi Matt,
                            What parts did it come with?
                            From where the existing air tube goes into the wing, all you should need is a large diameter (3" or so length) metal tube, the rubber elbow (see post above), a jubilee clip, the snorkel body with associated studs, washers and nuts, a right angle metal bracket and screws for the 'A' pillar (see post above for plastic inserts) another jubilee and finally the snorkel head and grille.

                            If you want to fit it as per my instructions you will also need some sealant, a drill, rivet gun or other fixing method for the metal tube, a hacksaw, a reciprocating or jigsaw with metal blade, sockets, screwdrivers, needle files, plastic inserts (see above), an old bike inner tube, a short length of plastic drain pipe, heat gun, long cable ties and lots of patience!

                            Best of luck

                            Comment


                            • #29
                              I have the 146 kit which doesn't have the short tube and spacer etc. I was hoping to see the original ss145HF instructions if possible, but will probably end up going from your pics which will be a great help!
                              I did a big post about the difference in the SS145HF, SS146HFE, and SS143HF in this thread:
                              http://www.toyotasurf.asn.au/forum/v...p?f=14&t=26074

                              Matt

                              Comment


                              • #30
                                Spacer

                                Hi Matt,
                                You can probably get away with using a bit more of the plastic drain pipe rather than the metal tube. The tube was a bit of a naff fit on the air tube anyway.
                                I don't think you will need anything else that can't be easily fabricated in some way. I note your question about seperating the wing at the top. I was able to get away without doing that, just working from below but I have skinny arms and it would make things easier I suppose to seperate them? Just bear in mind it's not quite as easy as it first appears to split them!
                                I have another one that needs fitting, when I get around to it I will measure up the exact location of the hole and try to make up a template as the one supplied with my kit was not accurate.
                                Good luck, I await your updates

                                Comment

                                Working...
                                X