Lower ball joints are very straight forward as they are fitted by way of 4 bolts.
The uppers however are a bit more involved. Below is the route I took in changing all 4 plus track rod ends. This is the first time I have ever change ball joints on a 3rd gen so please feel free to add and short cuts or hints to this thread that would help others following it.
1. Remove rear bash plate, the 3rd gen has two under the engine. This will allow access to the cross member for axle stands.
2. Jack up remove wheels place on stands.
3. Remove brake calliper. Held at the rear by two bolts, normal top and bottom location. Brake lines have two mounts, top one single bolt {remove} bottom one ABS line also clips into it. These are a rotten design threaded all the way through. {remove if you can} I ended up drilling out and refitting with nut and bolt.
4. Unbolt ABS sensor on back of hub 10mm bolt then wiggle out. Cable tie all this and calliper up out your way.
5. Disk will now lift off
6. If you are doing track rod ends {optional} I would slacken the lock nut at this point while everything is held in place. IMPORTANT! if you are not changing the track rod ends {no need to slacken lock nut} they will still need split from bottom ball joints. MAKE SURE the splitter is used at 90 degrees to truck and not in towards the bottom ball joint or splitter will foul on the bottom ball joint cast section and could damage the track rod joint.
You will have to remove the brake backing plate bolts {10mm} and spin the plate to allow the splitter the correct angle of use to track rod ball joint
7. Unbolt damper lower mounting bolt, knock bolt out. {allows wishbones more movement}
8. Knock of hub cover plate {flat blade screw driver small hammer}
9. Remove split pin and locking cover, remove hub nut {36mm}
10. I used the splitter separating the lower ball joint then remove 4 bolts holding it in place {underside of lower ball joint} If you are only changing the top no need to split the bottom one just undo bolts.
11. The hub will now pull away from cv joint, you can now remove top ball joint split pin and nut and split the joint. The whole assembly will come off now with the top ball joint in place.

12. Now save yourself some heartache and find someone who can press the old top joints out and the new ones in.

New top ball joint fitted.

Rebuild is the opposite of above. IMPORTANT! remember to fit the snap ring to the new top joints and the rubber sealing ring to the boot.
I removed the brake pads prior to rebuild and cleaned and copper slipped pad backs and pins. I then re-mounted the callipers prior to refitting pads
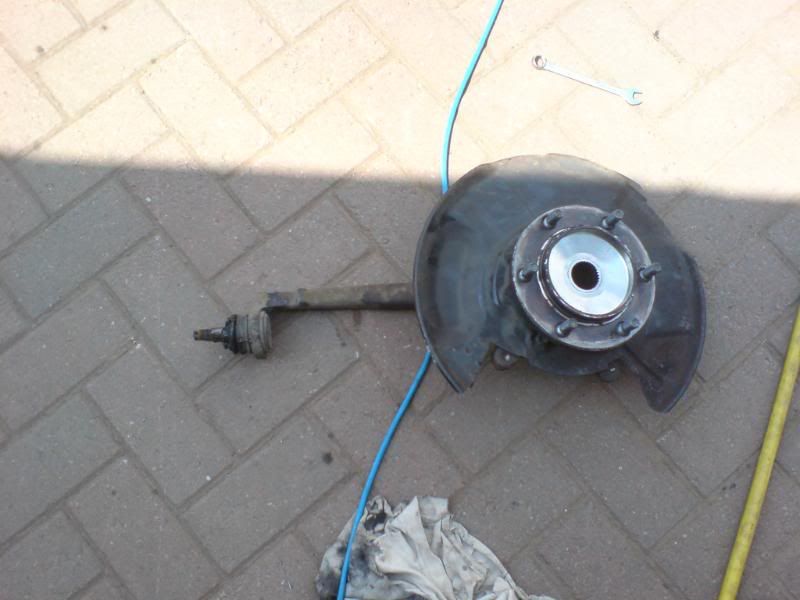
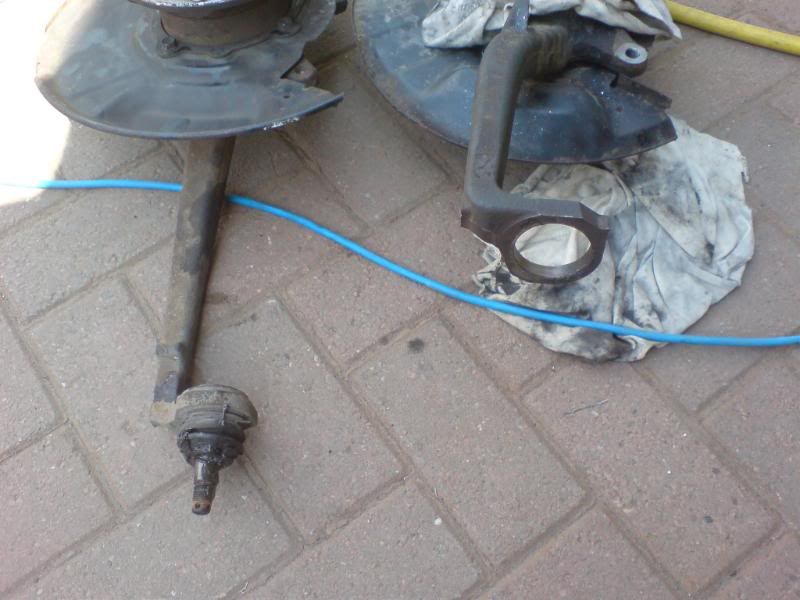
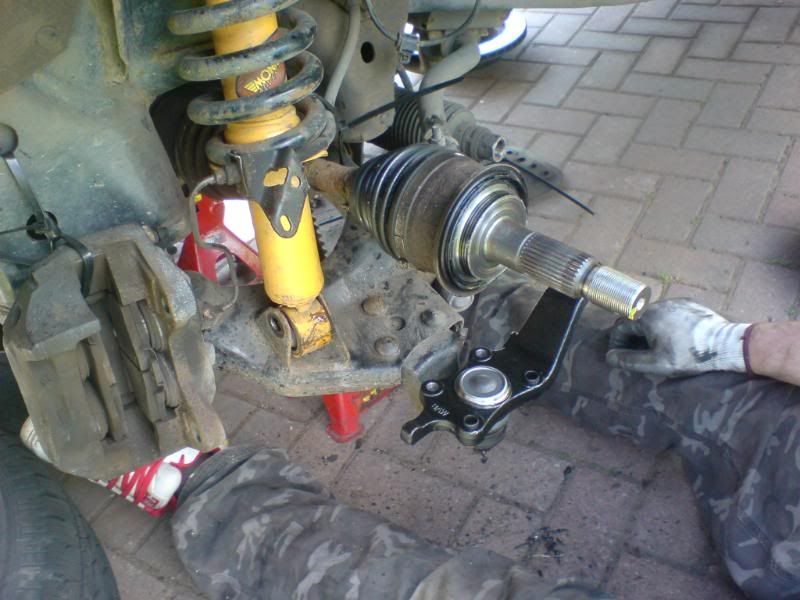
Various pics of strip down.


The uppers however are a bit more involved. Below is the route I took in changing all 4 plus track rod ends. This is the first time I have ever change ball joints on a 3rd gen so please feel free to add and short cuts or hints to this thread that would help others following it.
1. Remove rear bash plate, the 3rd gen has two under the engine. This will allow access to the cross member for axle stands.
2. Jack up remove wheels place on stands.
3. Remove brake calliper. Held at the rear by two bolts, normal top and bottom location. Brake lines have two mounts, top one single bolt {remove} bottom one ABS line also clips into it. These are a rotten design threaded all the way through. {remove if you can} I ended up drilling out and refitting with nut and bolt.
4. Unbolt ABS sensor on back of hub 10mm bolt then wiggle out. Cable tie all this and calliper up out your way.
5. Disk will now lift off
6. If you are doing track rod ends {optional} I would slacken the lock nut at this point while everything is held in place. IMPORTANT! if you are not changing the track rod ends {no need to slacken lock nut} they will still need split from bottom ball joints. MAKE SURE the splitter is used at 90 degrees to truck and not in towards the bottom ball joint or splitter will foul on the bottom ball joint cast section and could damage the track rod joint.
You will have to remove the brake backing plate bolts {10mm} and spin the plate to allow the splitter the correct angle of use to track rod ball joint
7. Unbolt damper lower mounting bolt, knock bolt out. {allows wishbones more movement}
8. Knock of hub cover plate {flat blade screw driver small hammer}
9. Remove split pin and locking cover, remove hub nut {36mm}
10. I used the splitter separating the lower ball joint then remove 4 bolts holding it in place {underside of lower ball joint} If you are only changing the top no need to split the bottom one just undo bolts.
11. The hub will now pull away from cv joint, you can now remove top ball joint split pin and nut and split the joint. The whole assembly will come off now with the top ball joint in place.

12. Now save yourself some heartache and find someone who can press the old top joints out and the new ones in.

New top ball joint fitted.

Rebuild is the opposite of above. IMPORTANT! remember to fit the snap ring to the new top joints and the rubber sealing ring to the boot.
I removed the brake pads prior to rebuild and cleaned and copper slipped pad backs and pins. I then re-mounted the callipers prior to refitting pads
Various pics of strip down.


 , saved for future reference, well done. Will need this sooner or later.
Comment