There's already a guide here......
http://www.4x4wire.com/toyota/tech/add/ ......... that shows you how to remove the troublesome vacuum part of the A.D.D., but I've added a few more detailed photos.
Jack both front wheels off the ground, support truck with axle stands and drain diff oil into a clean container. Or discard thoughtfully if re-newing
Once you've drained the diff oil from the drain bolt (22mm socket)....
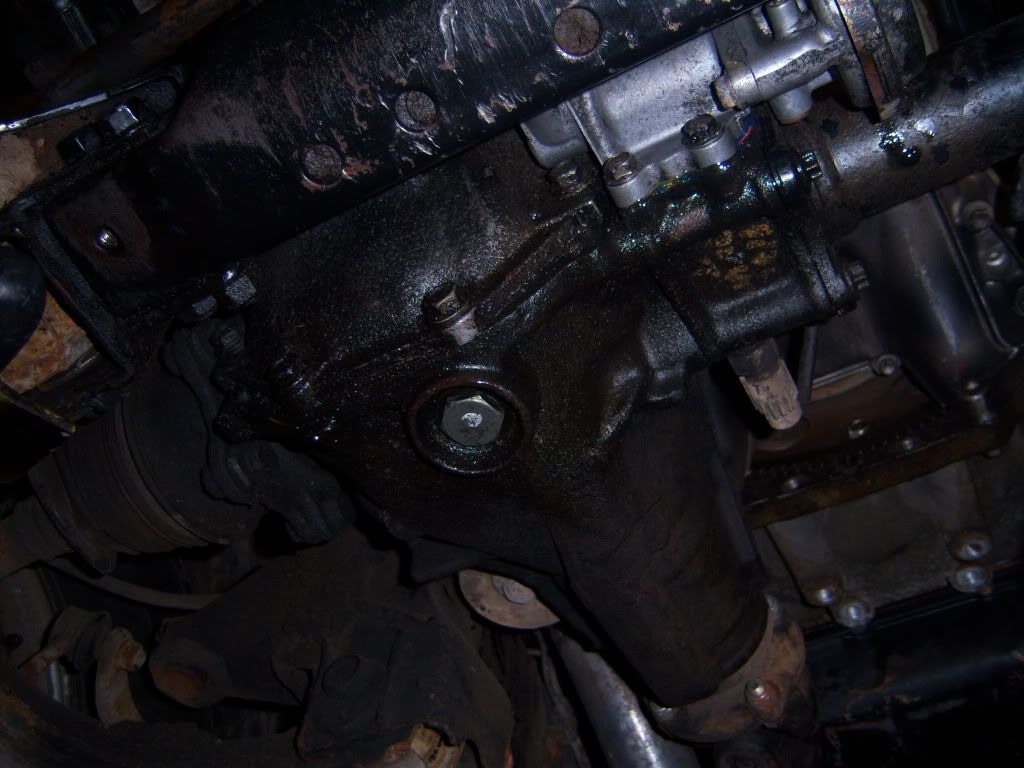
remove the vacuum operated actuator, four bolts. (12mm socket) white plastic plug and two small rubber hoses...
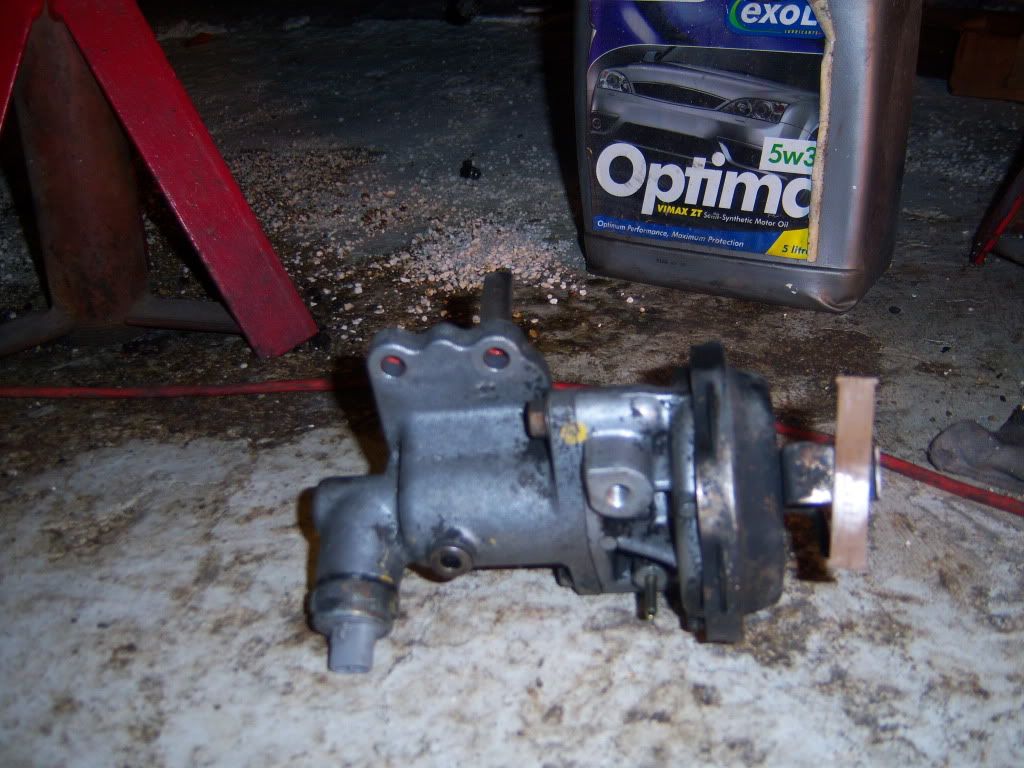
Place some rags or bowl on the ground under the diff as more oil will drip out as you remove the actuator. It may need a tap to break the gasket seal.
This the actuator removed....
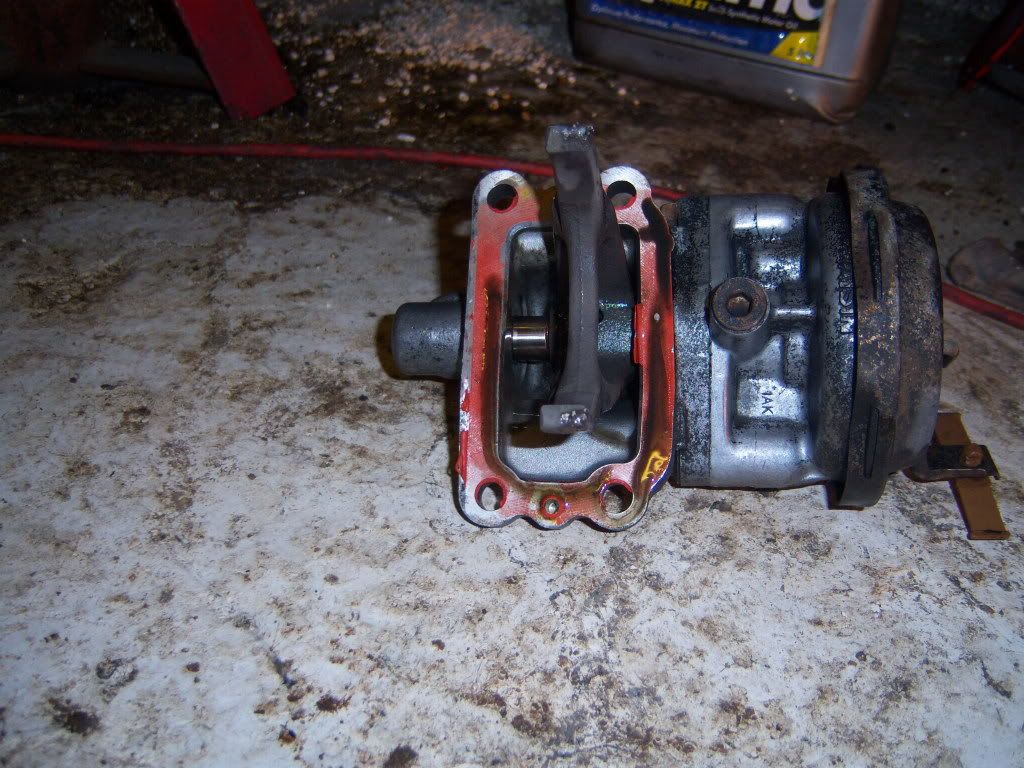
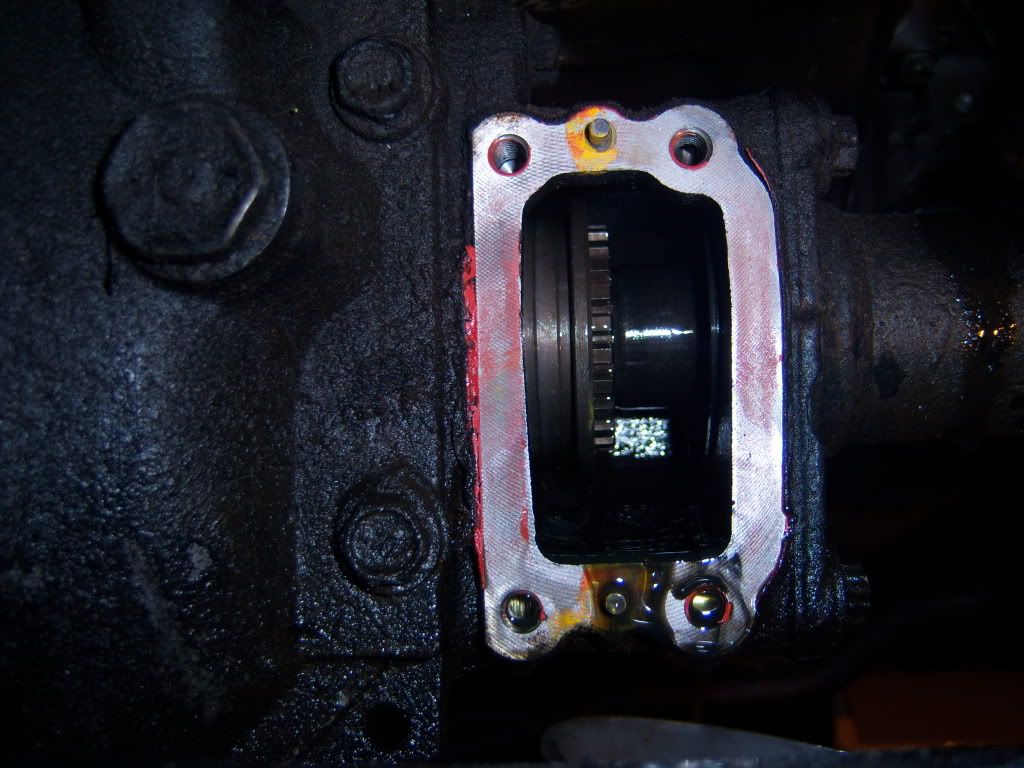
Looking at the diff, you'll see the collar that slides across to lock the passenger side driveshaft to the diff. (collar shown in the unlocked position, (2WD)
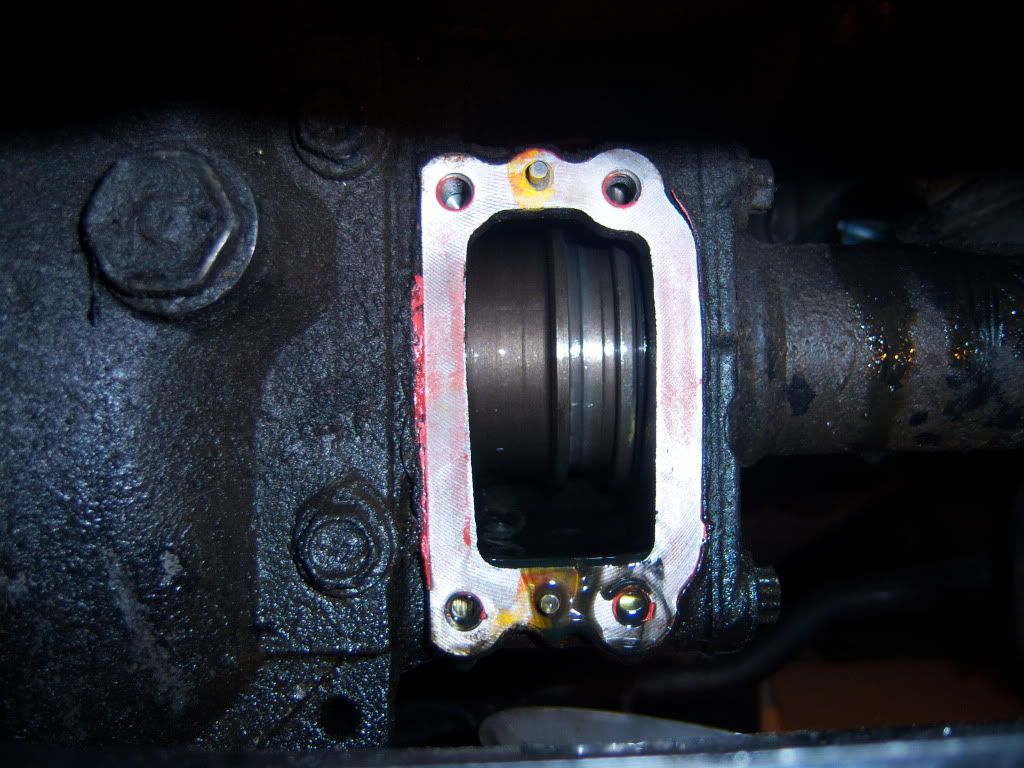
Slide the collar across to the driver's side, you may have to turn one of the front wheels slightly for it to engage the splines.
This is the locked position.....(4WD)
Next you'll need to slide the selector fork of the actuator over towards the driver's side...
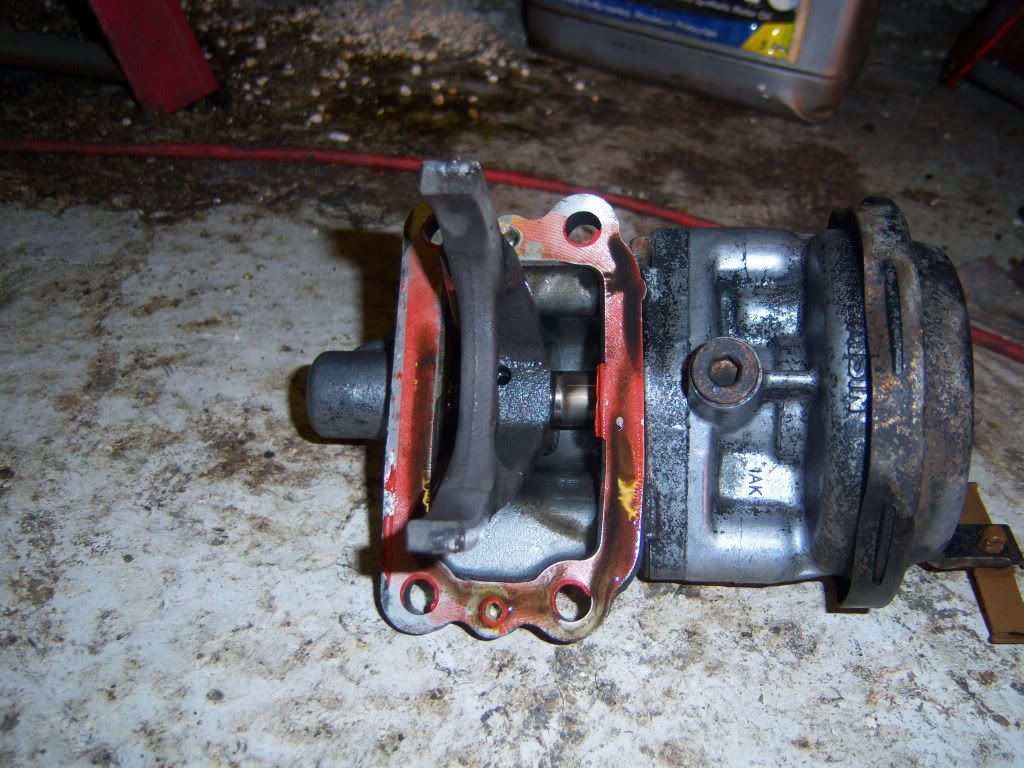
Then get a Jubilee clip small enough to fit in the space on the actuator fork's rod, and open it out.........
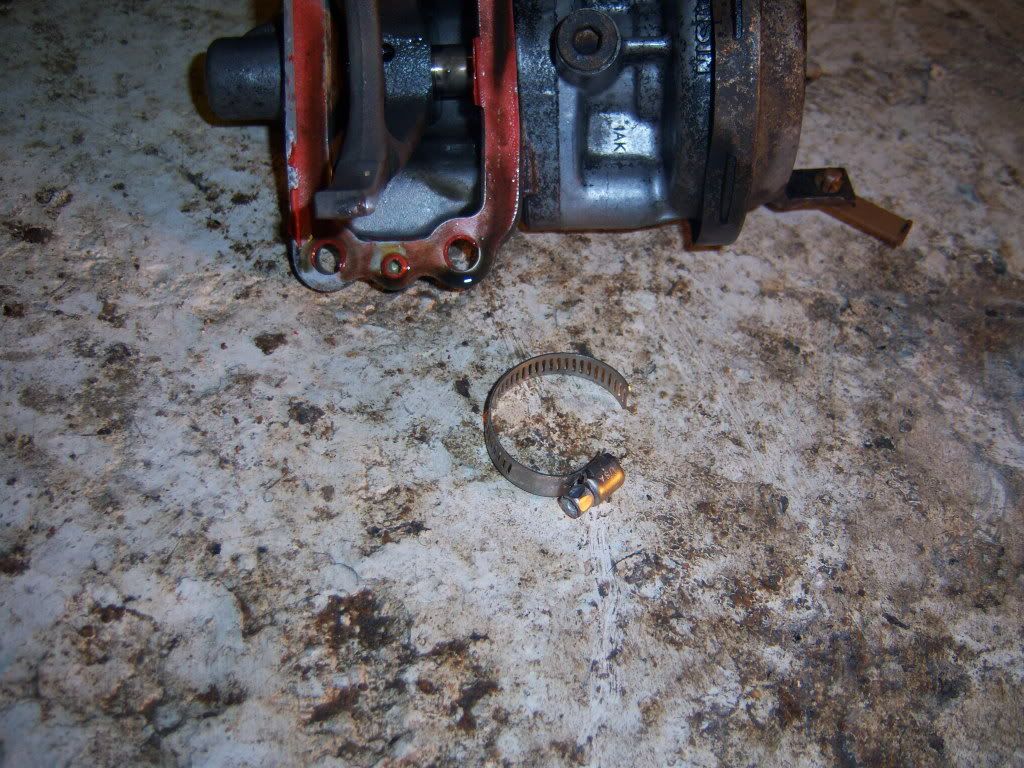
Then feed it around the actuator rod, a bit fiddly, and close it back up. No need to be super tight, just pinched closed...
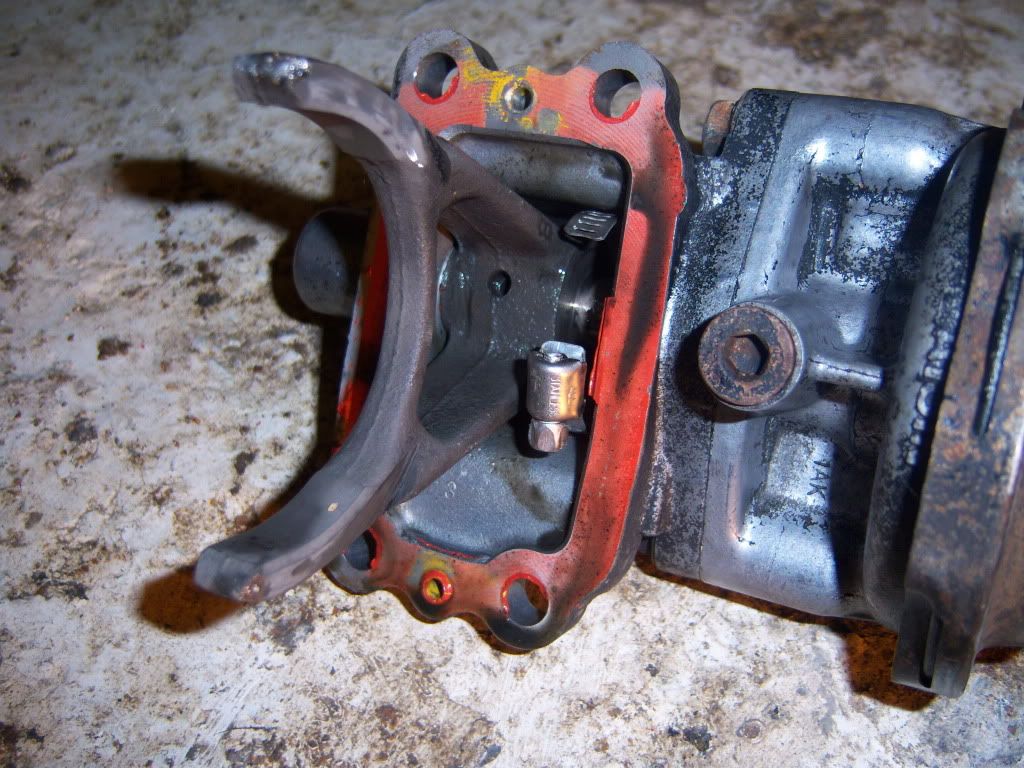
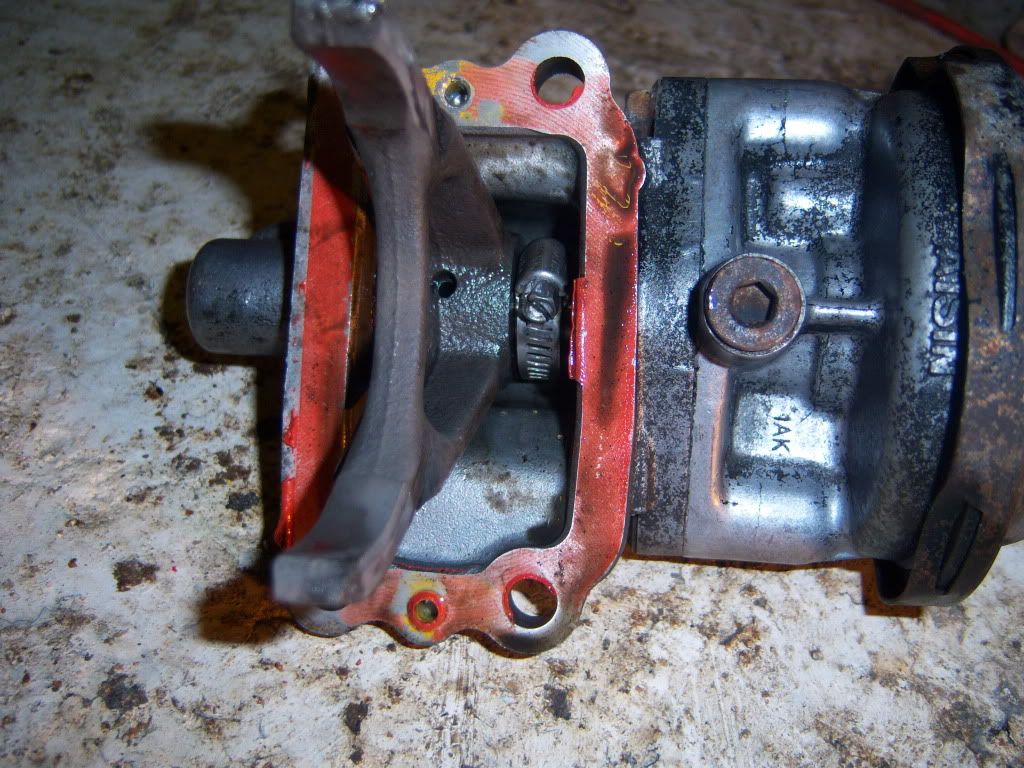
This will keep the selector fork in the 4wd position.
Once you've done that, you'll need to either connect to now open vacuum ports with a short length of rubber hose to stop dirt/mud/water ingress...
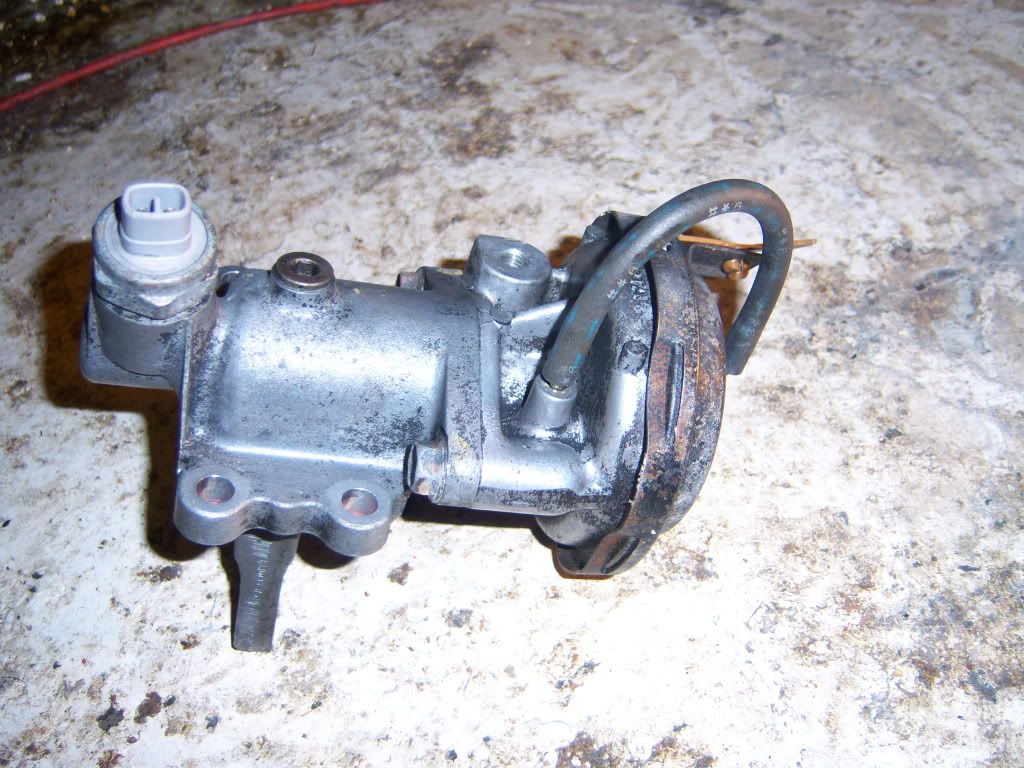
Or just squash them closed with some pliers like I do....
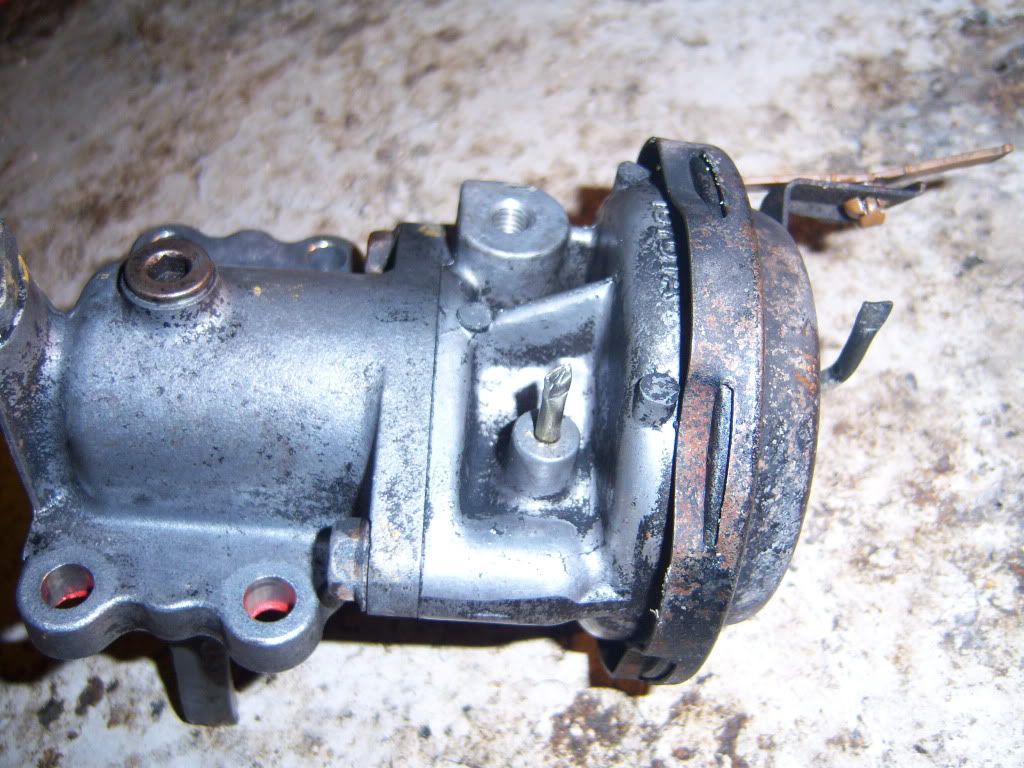
Next you need to scrape off the old instant gasket goop from both mating surfaces of the actuator and diff housing....
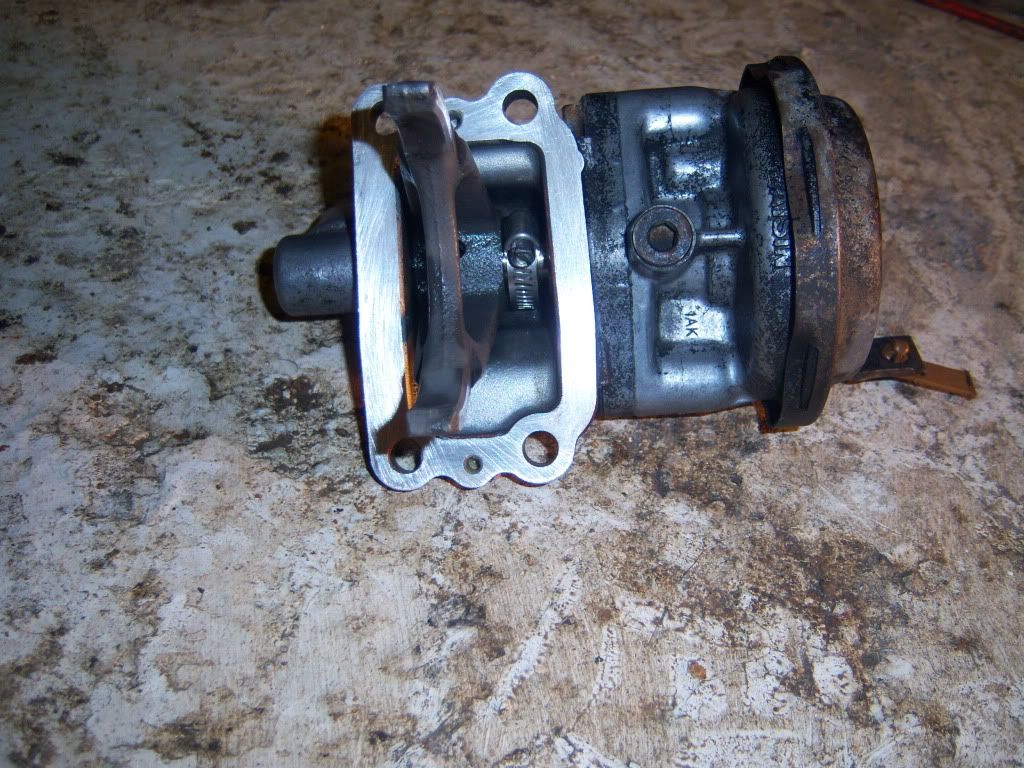
Apply some instant gasket or RTV sealant....
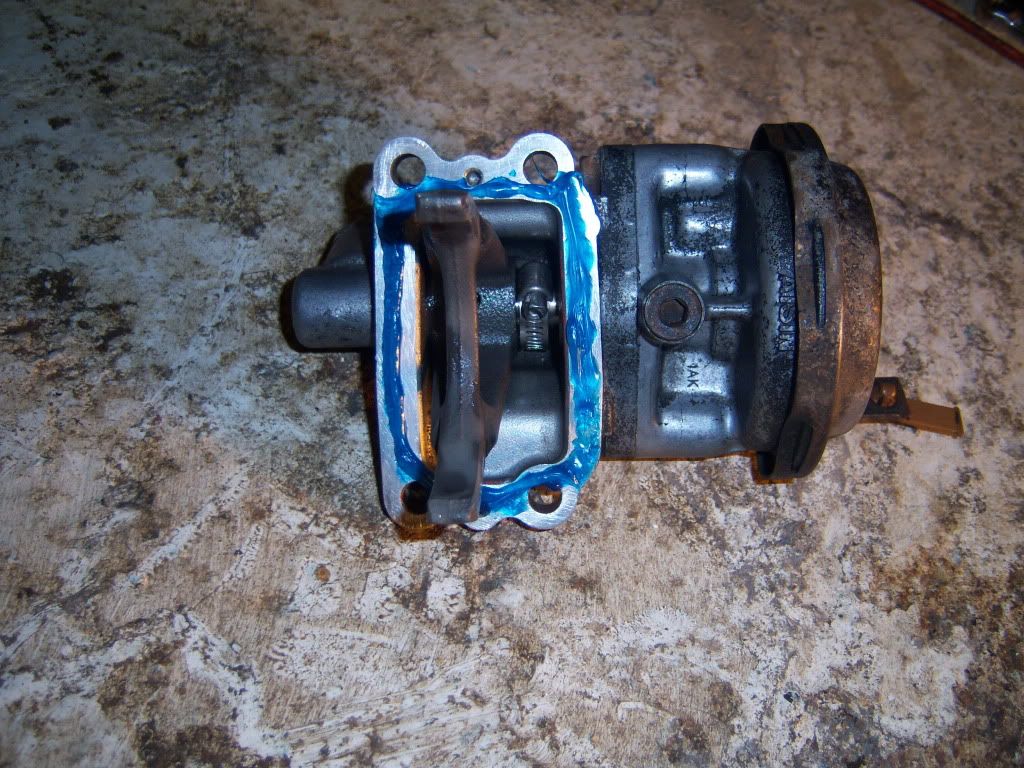
Now fit actuator assembly back onto diff housing, making sure the collar stays in the 4WD position on the splines as you go.
Loosly fit the four bolts (12mm socket) and check that the collar is in the 4WD position by turning one of the front wheels. The other side should turn in the other direction.
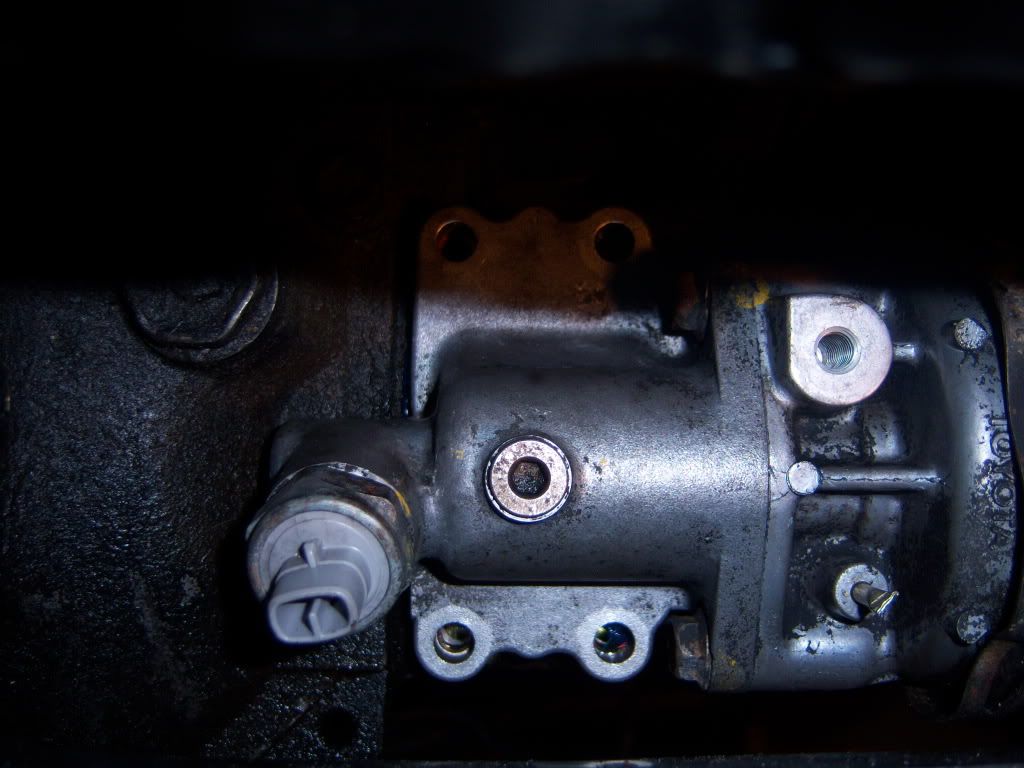
Alternatively, select L4 via the transfer lever and grasp the front prop and turn it. Both front wheels should turn.
If all OK, tighten the four bolts, (two grunts is plenty, you're only preventing diff oil leaks) and plug in the white plastic plug. This will make sure the green 4WD light on the dash still works.
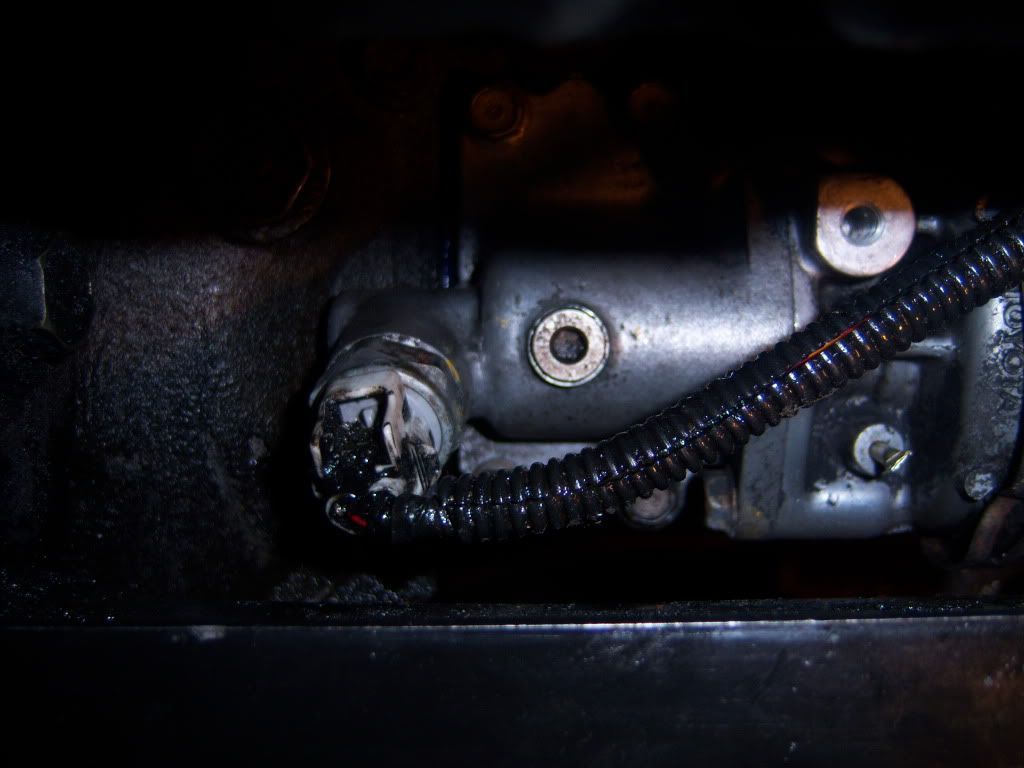
Now you can discard those two vacuum lines that run from the VSVs on the inner wing down to the front diff...(and the VSVs too if you want to tidy up the engine compartment)
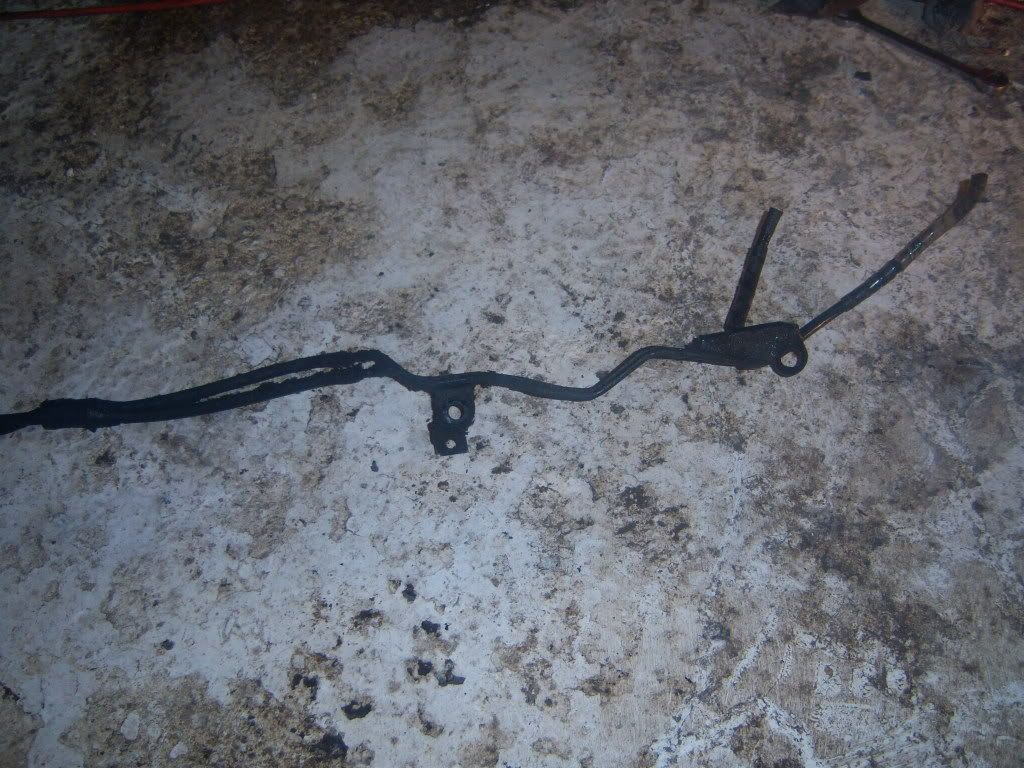
Now comes the fiddly bit of re-filling the diff oil you drained earlier via the filler bolt just above the electrical connector......
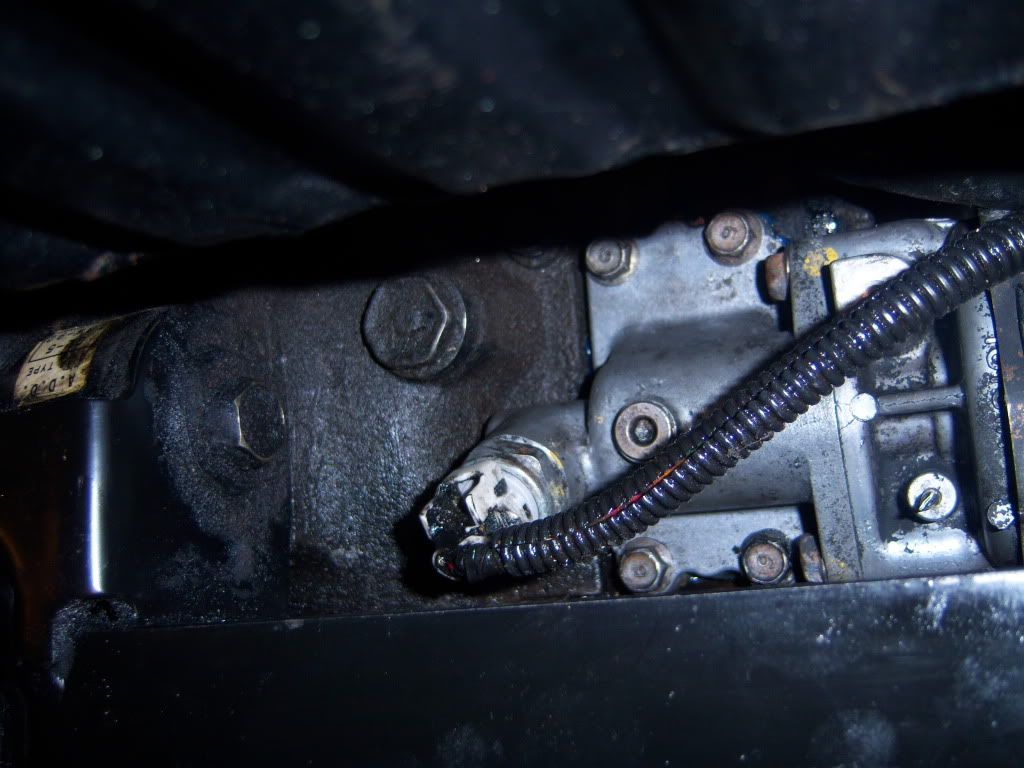
It took a while, but I used a turkey baster, but you could rig up a hose and pour the oil in from above I suppose, but remember, diff oil bluddie stinks!
Now move the transfer lever back into H2 position, switch on ignition and press the 4wd button on the transfer lever. Listen as 4WD instantly engages at the press of the button, and disengages when the button is off. The green 4WD light on the dash should still work as normal.
The same results when L4 is selected via the transfer lever.
Thats is all, now go out and get smelly!
http://www.4x4wire.com/toyota/tech/add/ ......... that shows you how to remove the troublesome vacuum part of the A.D.D., but I've added a few more detailed photos.
Jack both front wheels off the ground, support truck with axle stands and drain diff oil into a clean container. Or discard thoughtfully if re-newing
Once you've drained the diff oil from the drain bolt (22mm socket)....

remove the vacuum operated actuator, four bolts. (12mm socket) white plastic plug and two small rubber hoses...

Place some rags or bowl on the ground under the diff as more oil will drip out as you remove the actuator. It may need a tap to break the gasket seal.
This the actuator removed....

Looking at the diff, you'll see the collar that slides across to lock the passenger side driveshaft to the diff. (collar shown in the unlocked position, (2WD)

Slide the collar across to the driver's side, you may have to turn one of the front wheels slightly for it to engage the splines.
This is the locked position.....(4WD)

Next you'll need to slide the selector fork of the actuator over towards the driver's side...

Then get a Jubilee clip small enough to fit in the space on the actuator fork's rod, and open it out.........

Then feed it around the actuator rod, a bit fiddly, and close it back up. No need to be super tight, just pinched closed...


This will keep the selector fork in the 4wd position.
Once you've done that, you'll need to either connect to now open vacuum ports with a short length of rubber hose to stop dirt/mud/water ingress...

Or just squash them closed with some pliers like I do....

Next you need to scrape off the old instant gasket goop from both mating surfaces of the actuator and diff housing....

Apply some instant gasket or RTV sealant....

Now fit actuator assembly back onto diff housing, making sure the collar stays in the 4WD position on the splines as you go.
Loosly fit the four bolts (12mm socket) and check that the collar is in the 4WD position by turning one of the front wheels. The other side should turn in the other direction.

Alternatively, select L4 via the transfer lever and grasp the front prop and turn it. Both front wheels should turn.
If all OK, tighten the four bolts, (two grunts is plenty, you're only preventing diff oil leaks) and plug in the white plastic plug. This will make sure the green 4WD light on the dash still works.

Now you can discard those two vacuum lines that run from the VSVs on the inner wing down to the front diff...(and the VSVs too if you want to tidy up the engine compartment)

Now comes the fiddly bit of re-filling the diff oil you drained earlier via the filler bolt just above the electrical connector......

It took a while, but I used a turkey baster, but you could rig up a hose and pour the oil in from above I suppose, but remember, diff oil bluddie stinks!
Now move the transfer lever back into H2 position, switch on ignition and press the 4wd button on the transfer lever. Listen as 4WD instantly engages at the press of the button, and disengages when the button is off. The green 4WD light on the dash should still work as normal.
The same results when L4 is selected via the transfer lever.
Thats is all, now go out and get smelly!


Comment