If this is your first visit, be sure to
check out the FAQ by clicking the
link above. You may have to register
before you can post: click the register link above to proceed. To start viewing messages,
select the forum that you want to visit from the selection below.
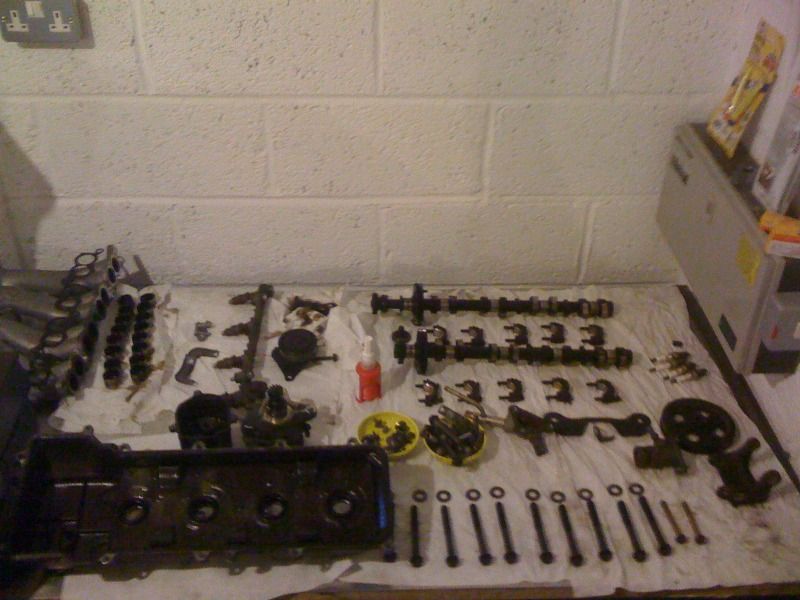
The parts are not numbered.
The spark plugs are not in a line.
The plugs are for the bin the new ones can be seen on top of the leccy board still in there boxes. All identical in apperance parts laid in removal order no need for numbers.
The head came back after being skimmed and pressure tested, all was good.
I gave it a good check over and blew any last remaining swarf off and wiped down with surface cleaner.
The second pic shows the cylinder head rear cover, I removed the pipes and plug from this then took it off with the head before removing the cover and cleaning gasket surfaces. I put it back on before the head went on.
Attached Files
Alan
yoshie "Didn't know they had a pill for laziness, anyway get well soon."
Before dropping the gasket on a bit of Hylomar is needed at the timing gear cover and block union, it's easy to see where they join, only apply a small amount. Clean the area thoroughly first. I used a degreaser and a fine scotchbrite pad, it won't take any metal off (you can use this to clean the rest of the block deck too) Use a surface cleaner before applying Hylomar.
Attached Files
Alan
yoshie "Didn't know they had a pill for laziness, anyway get well soon."
When you get your new gasket you will notice that the water channels are a lot smaller than the channels in the block and head, don't panic, this is correct.
Attached Files
Alan
yoshie "Didn't know they had a pill for laziness, anyway get well soon."
Make sure the cylinder bores are nice and clean and apply a light wipe of fresh engine oil before placing the head on.
Clean and inspect head bolts and wipe on some engine oil under the bolt head and along thread.
I bolted down my head tonight, follow the procedure in the manual. The initial torque setting is 39Nm but you must do this in a few passes, I started hand tight with socket on extension bar and then 10Nm followed by 20Nm, then 30Nm and finally 39Nm.
You then have to mark the front of each cylinder head bolt with a suitable marker (silver Sharpie pen worked fine) and then turn each bolt (in the correct order) a further 90 degrees, you then have to repeat the process, turning another 90 degrees until the marks you made are at the rear.
Finally install the two timing chain housing bolts.
I used a zero to 60Nm torque bar for the first passes up to 39Nm and then a larger torque bar for the 90 degree turns, the longer bar made it easy to judge the 90 degrees and then check with the marks I made on head bolts.
Alan
yoshie "Didn't know they had a pill for laziness, anyway get well soon."
I'll be fitting the rest tomorrow, installing the cams and checking valve clearances. Having pics to look at has made it a really easy job to assemble again.
Alan
yoshie "Didn't know they had a pill for laziness, anyway get well soon."
Truck is alive and purring again.
Wee oil leak at the chain tensioner which needs a new gasket.
Exhaust is still purging all the water and the cat is smelly, hope it's not damaged.
Turned the engine over by hand a few times, then with the leads off and then she started first crank, always a happy moment.

 Tweet
Tweet


Comment