Well the kit arrived this morning, much to my surprise as it was only posted last night. Anyway, i wasted no time and got right on with the fitting.
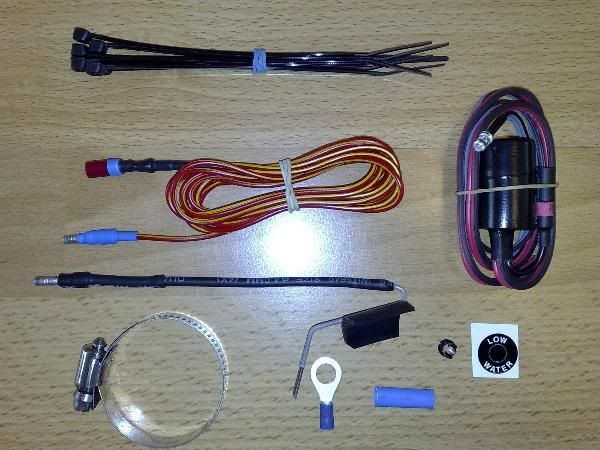
The kit consists of:
The probe
The wiring loom for the probe
A prewired buzzer and led
Led bezel
(Top hose) Jubilee clip
"low water" Led surround dash sticker
Earth connector (with heat shrink)
Zip ties
And a complimentry pen. (thanks Haydn)
Fitting the kit to the 1KZ-TE:
The first and most important thing is to fit the kit to a cold engine.
Secondly, remove the radiator cap and top hose:
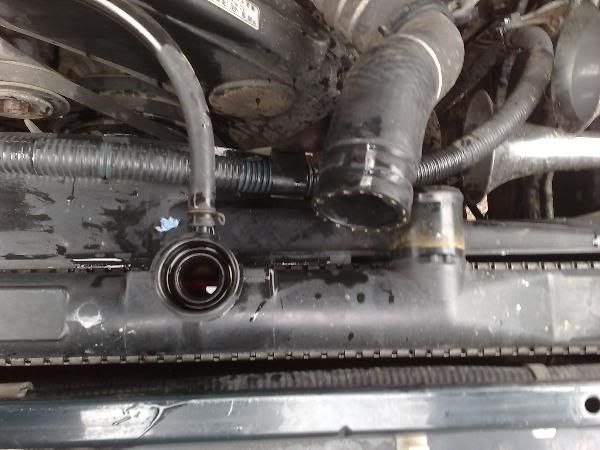
Drain the coolant just enough so the top hose is emptied, i just crimped the hose clamps with a pair of grips and removed the hose completely:
For those of you doing this on your drive, you may want to drain it from the radiator drain at the bottom of the rad.
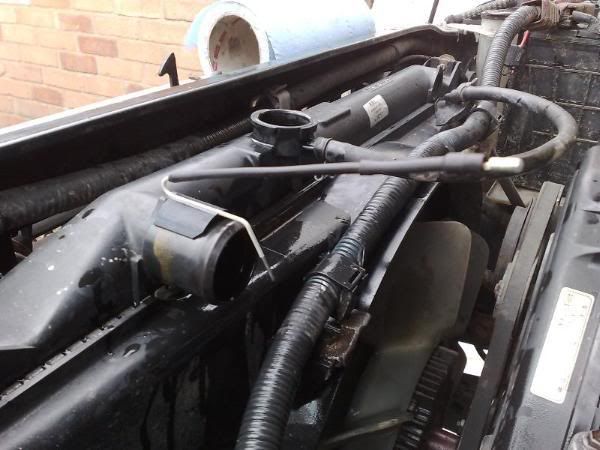
Next came the fitting of the probe to the top radiator spiggot, this was relatively simple as all it required was a dab of super glue to hold it in place and then sealing the edge and top of the probe with silicone sealant. I used white with leek trace so it will turn red if sealant leaks from this joint. (just so i know the jubilee clip is secure enough)
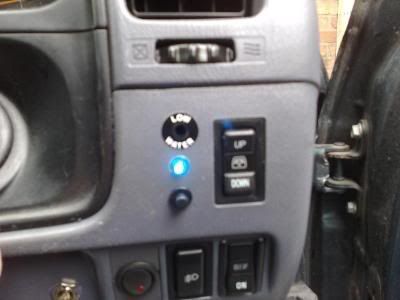
With the probe now in it's position i left it for the silicone to cure and went on to fit the rest of the kit. This was started with the prewired buzzer and led. For the led i drilled a 6.5mm hole in the dash to the right of the steering wheel and pushed the bezel into place and affixed the "low water" sticker around the bezel:
The buzzer was secured using zip ties to tie it to the vehicles wiring loom below the steering column.
Now for the wiring, This was straight forward as all that's required is an ignition switched live and an earth. Previously i have installed a secondary ignition switched 6 way fuse block in my engine bay so this is where i got my switched live from. The earth went to the bolt that holds the lower dash bracket to the chasis. Simply undo the bolt, fit earth loop over the bolt and refit it.
Now it was time to wire the probe to the prewired loom. from the buzzer/led loom plug the bullet connectors from the alarm and the probe wire together, run that into the engine bay via the rubber grommet in the bulkhead and connect the other end to the probe, again using bullet connectors. Zip tie this wire around the outer of the engine bay to the existing wiring loom.
Now back to the probe. Make sure the silicone has dried and refit the top hose using the original spring clip on the lower of the hose (to thermostat housing)and the supplied jubilee clip for the top hose fitting (to the rad):
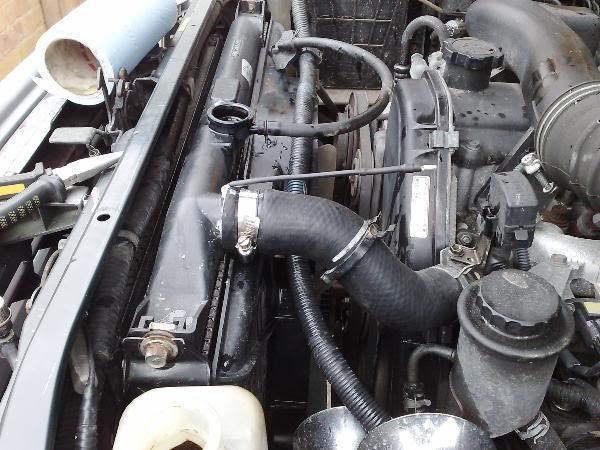
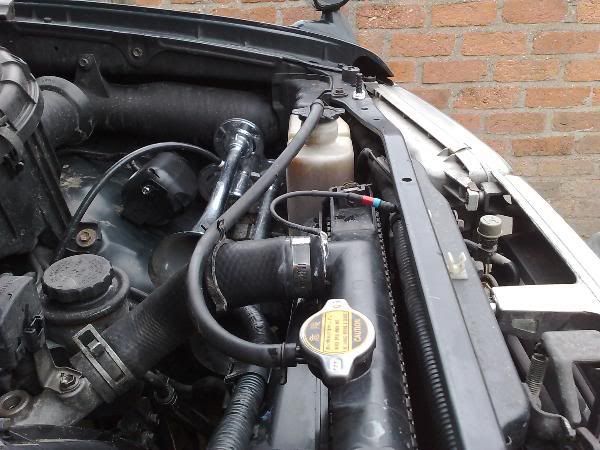
Appart from topping up with coolant, that was it.
So now comes the big tester, before topping up the system, i switched on the ignition to make sure the probe was functioning as it should. So i switched the ignition on and the led lit up and the alarm sounded:
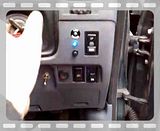
No alarm.
The bleep and led flash you hear when the ignition is turned on is the unit status pre check.
A big thankyou to Haydn Callow for supplying the kit for trial purposes.
The kit consists of:
The probe
The wiring loom for the probe
A prewired buzzer and led
Led bezel
(Top hose) Jubilee clip
"low water" Led surround dash sticker
Earth connector (with heat shrink)
Zip ties
And a complimentry pen. (thanks Haydn)


Fitting the kit to the 1KZ-TE:
The first and most important thing is to fit the kit to a cold engine.
Secondly, remove the radiator cap and top hose:

Drain the coolant just enough so the top hose is emptied, i just crimped the hose clamps with a pair of grips and removed the hose completely:

For those of you doing this on your drive, you may want to drain it from the radiator drain at the bottom of the rad.
Next came the fitting of the probe to the top radiator spiggot, this was relatively simple as all it required was a dab of super glue to hold it in place and then sealing the edge and top of the probe with silicone sealant. I used white with leek trace so it will turn red if sealant leaks from this joint. (just so i know the jubilee clip is secure enough)
With the probe now in it's position i left it for the silicone to cure and went on to fit the rest of the kit. This was started with the prewired buzzer and led. For the led i drilled a 6.5mm hole in the dash to the right of the steering wheel and pushed the bezel into place and affixed the "low water" sticker around the bezel:

The buzzer was secured using zip ties to tie it to the vehicles wiring loom below the steering column.
Now for the wiring, This was straight forward as all that's required is an ignition switched live and an earth. Previously i have installed a secondary ignition switched 6 way fuse block in my engine bay so this is where i got my switched live from. The earth went to the bolt that holds the lower dash bracket to the chasis. Simply undo the bolt, fit earth loop over the bolt and refit it.
Now it was time to wire the probe to the prewired loom. from the buzzer/led loom plug the bullet connectors from the alarm and the probe wire together, run that into the engine bay via the rubber grommet in the bulkhead and connect the other end to the probe, again using bullet connectors. Zip tie this wire around the outer of the engine bay to the existing wiring loom.
Now back to the probe. Make sure the silicone has dried and refit the top hose using the original spring clip on the lower of the hose (to thermostat housing)and the supplied jubilee clip for the top hose fitting (to the rad):


Appart from topping up with coolant, that was it.
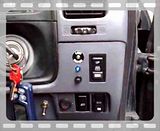
So now comes the big tester, before topping up the system, i switched on the ignition to make sure the probe was functioning as it should. So i switched the ignition on and the led lit up and the alarm sounded:

Then i topped the system up with coolant and tried again and....:
No alarm.
The bleep and led flash you hear when the ignition is turned on is the unit status pre check.
I must say that the probe is very similar to one used by a certain car manufacturer for their screen washer bottles.
The kit is very well put together and is easily fitted by anyone who has a little knowledge of auto electrics (ie finding a switched live)The included instructions are very understandable and well written.
It took me just over 1 hour start to finish.
All that remains now is to give the kit a right good testing, but until i start to loose coolant i guess i'll never know, so doing the check before you top up the coolant is a must just to confirm the system actually works. That's enough for my satisfaction in knowing that if i ever loose any, the kit will keep me well informed.
I have a tm2 engine monitor fitted also which is basically a digital temperature sensor with a temp probe connected to the engine and an led display which alarms at a pre set temp. This is a useful bit of kit for knowing what temp the engine is running at but knowing what's going on in the cooling system is extra peace of mind, for me anyway.
A big thankyou to Haydn Callow for supplying the kit for trial purposes.


Comment